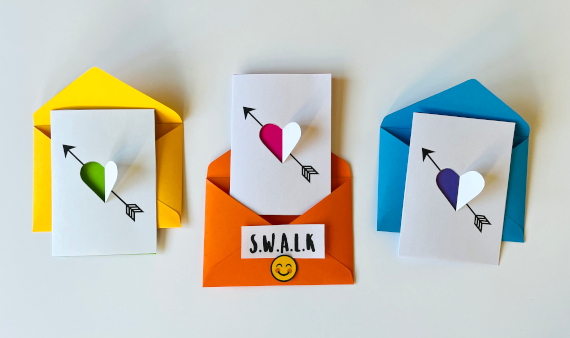
Adult/teenage craft
Watermelon bunting (+ template) // 3D fruit!
Hello! I’ve been working on some fruity gift-boxes for the new book. While I was putting the templates together I thought the watermelon design would make nice bunting!

I have 10 days left to finish all the projects for my book. (Hurray! Phew! Eek!)

Hope you are all doing well.

If you fancy making a watermelon garland you will find the template at the foot of the post.

Watermelon garland template: Click to download PDF
- – - – - – - – - – - – - – - – - – - – -
Off topic: I have finally joined twitter (although I must be the quietest tweeter that walked the earth – however I am tweeting when I add a new post). I have also claimed my blog through bloglovin. I’ve only started using bloglovin today but it seems like a handy tool if you struggle to keep track of the blogs you like.
- – - – - – - – - – - – - – - – - – - – -
DIY word search gift wrap
Hello to everyone. Hope you have all had a lovely Easter (that’s if you celebrate it of course!).
I saw this wrapping paper a while back and thought it was pretty cool.
There are loads of ‘wordsearch generators’ available online so it’s really easy to make your own personalised word search gift wrap. You don’t even need much in the way of supplies…just some white paper and some highlighter pens (or you can use highlighter strips).

I created my word search using puzzlemaker.com. My grid contained 20 columns and 24 rows. This fills an A4 sheet. Make sure you only print the first page out though…the second page just contains the words you have added.
I also put each word into the wordsearch generator about 6 times (as some words appear backwards or aren’t in the right place after wrapping the present).

Instead of wrap you could make some wide gift ribbon to wrap around a present. You could also make some nice cards, envelopes or small gift-bags!
After a quick google I found another DIY word search gift wrap tutorial here so you may wanna check that out for more tips.

Happy word-searching ^_^


Origami rabbit // chocolate wrapper
This post is for the minimalists amongst you! (I’m not sure if it’s a step too far but I kinda like it….and it’s a nice way to wrap a chocolate bar for a grown up.)

It was inspired by this tattoo.

You can print it out on any colour paper you want…it actually looks really nice just on plain white (files are at the foot of the post).

Hope you all have a lovely Easter….

Since making this I also saw this free printable origami rabbit gift-tag on eatdrinkchic.com. Do visit…there are lots of nice things to see there.
Edited to add: If you want to fold some real rabbits then check out this origami rabbit tutorial I spotted today on howaboutorange!


FILES
/////////
Please print this out as ‘image’ or ‘text and image’. If you print it out as text it may not print the dotted lines. You can find the settings in your print dialog.
These wrappers may not fit your bar of chocolate exactly so you may have to cut to size.
Small rabbit wrap (e.g. Fits perfectly on Green & Blacks or Lindt chocolate bars)
Print on A5 paper (½ sheet of A4)
Large rabbit wrap
Print on A4 paper
Simple hanging vase // Josephine knot & gathering knot
Hello there! Minieco feels a bit neglected at the moment :/ However behind the scenes I have been crafting my little heart out.
I’ve been bead-weaving, sewing, dyeing, printing, woodworking, macramé-ing and paper-crafting my way through 30 new projects for my new book (I’m 2/3 of the way through the project list so hope to be posting a lot more in April).
My macramé obsession has reached fever pitch lately. I made a quick hanging vase this morning and thought it would be nice to share it with you.
To make this hanging vase you only need to learn a ‘Josephine knot’ (aka Carrick bend) and a ‘gathering knot’ so it’s a lovely easy project if you are just starting out down the macramé/knot-tying route.


YOU WILL NEED:
- – – – – – – – – –
+ 4 lengths of cord measuring at least 1.5 meters (I used super long shoelaces – but you can use paracord instead)
+ About 50cm of cord (I used a contrasting colour)
+ Glass vase….a jam jar works just as well.
+ Elastic band (optional)
+ Some flowers!
HOW TO
- – – – – – -
First of all you need to master the Josephine knot. Check out the animated gif below. Once you have done this follow the rest of the instructions below:

1. Find somewhere to work…a wall hook works well, or you can use a door handle! Hang your ring on the hook and thread your cords through the ring at their halfway point. You should have 8 working cords.
2. Now you need to do a gathering knot. Chop your extra piece of cord into two pieces. Take one piece and form a loop as shown
3. Take the right-hand section of cord and wind it tightly round the 8 cords. You should do this about 6 times.
4. Now take your bottom-tail and thread it through the loop at the bottom.
5. Pull on the upper tail.
6. Keep pulling until the loop is tucked inside the cord wrap. You can trim the ends. Depending on your cord you may need to seal the ends with a lighter to stop them from fraying. (Take care with this step and practise on a spare piece of cord first).
7. Leave a gap then tie a Josephine knot using the front four pieces of cord.
8. Turn your curtain ring around and repeat step with the back four pieces of cord.
9. Leave a gap again and tie two more Josephine knots as shown.
10. Pop your vase/jar inside and see how it fits. You may need to alter the position of the Josephine knot depending on the shape of the vessel you use. Put an elastic band around the eight cords so that your vase/jar is well supported. Take the other piece of cord and tie another gathering knot at the bottom.
Good luck! Let me know how you get on.

BTW: I have been dreadful at replying to emails and comments over the last few weeks…I will make a concerted effort to catch up over the next few days ^_^
Woven heart card
Hello there…this is my last valentines post! As you can see I’ve been weaving hearts. Remember the woven space invaders? Well, I have been meaning to weave a heart card for ages and I f-i-n-a-l-l-y got around to doing it!

I used some graduated fluorescent paper (yes, ebay is my best friend!). You could try normal fluorescent strips, rainbow strips, gold strips…

The how-to is below….and the templates, as usual, are at the foot of the post.

FOR THE WOVEN HEART CARD YOU WILL NEED:
- – – – – – – – – – – – – – – – – – – – – – – – – – – – –
+ Colored paper strips (5mm wide). Quilling strips work perfectly.
+ A4 paper for the card & envelope
+ Scissors
+ Ruler
+ Something to score the paper
+ Craft knife and cutting mat
+ Sticky tape/glue
+ Printable templates (at the foot of the post)
HOW TO
- – – – – – -
1. Print out the template for the card. I just used regular white printer paper but you can use any colour you want. Cut around the outside of the card and then, using a craft knife and ruler, cut along all the vertical slits.
2. Cut out 14 paper strips. They need to be 5mm wide.
3. Weave the paper strips into the slits to create your heart shape. You will need to put some sticky tape onto the end of each strip to hold it in position.
4. Trim the edges, then fold the bottom flap of the card over and glue into position.
5. Print out the template for the envelope. Cut, score and glue. You can even make some paper confetti from the leftover paper strips.
6. Ta-da! Job done.
TOP TIPS
- – – – – – -
+ Once you have cut your slits, make sure that you work on the reverse side of the paper, so that the printed lines end up on the inside of the card.
+ When you have finished your card pop it under some heavy books to make it super-flat.
TEMPLATES
- – – – – – -
Boxed geometric heart
Ireally liked the 3D hearts in the gift-wrap I showed previously so I’ve been making paper versions! They make a nice alternative to a card.

You can even make one every color of the rainbow.

There is a little box which you can make to put the hearts in (each box fits two hearts).

Templates for the box and the hearts are at the foot of the post. It’s a fairly straight forward cut, score, fold, glue project. Any problems then do leave a comment.


They look great in neon but I’ve found the neon colours really hard to photograph. Tips please!

+ 3D paper heart template
+ Box for 3D paper heart
Popup pixel valentines card 2013 (*new & improved*)
Hello! Here is the ‘new & improved’ valentine popup template as promised. As you can see there are only a few minor changes. Most importantly it now pops up the other way so it can be stood on a mantelpiece or windowsill. There is also an added ‘chink’.

Templates (+ cutting/scoring guide) are at the foot of the post. Refer to the old post for instructions but make sure you use the new cutting/scoring guide and templates below. As usual, if there are any problems please leave a comment.

TOP TIPS
- – - – - – - – - – - –
+ Use good quality paper or card for the insert. I would say no heavier than 160gsm for best results.
+ Use the point of a needle (and a ruler) to score. That way you get really crisp folds.
+ Take your time and cut/score as precisely as you can.
+ Once you have scored and cut all the lines flip the piece of paper over before popping the heart out…this means the printed lines will be hidden from view.
+ Do make a test card because the second attempt is always better (there are two inserts on the pdf ^_^).

Good luck!
(Boxed geometric heart to come next week…)

TEMPLATES
- – - – - – -
Templates for light paper:
+ Heart insert and outer card
+ Envelope
Templates for dark paper
+ Heart insert and outer card
+ Envelope
- All I need… (my mum's blog x)
- Arvindgupta Toys
- Beci Orpin
- Chez Beeper Bebe
- Colossal
- Craftgawker
- Crow roosters crow
- Curly Birds
- diy or die
- Fine Little Day
- Handmade Charlotte
- Hello Kiddo
- IDN Magazine
- Kickcan & Conkers
- Kireei
- le dans la
- LMNOP
- Lullatone home orchestra
- misako mimoko
- Officers (my cousins band)
- Papercrave
- Piles of washing
- Poppytalk
- Red Ted Art
- Sausage Jar
- Swiss Miss
- Tattly
- Wabi-sabi wanderings
- What I Made
- Whipup


