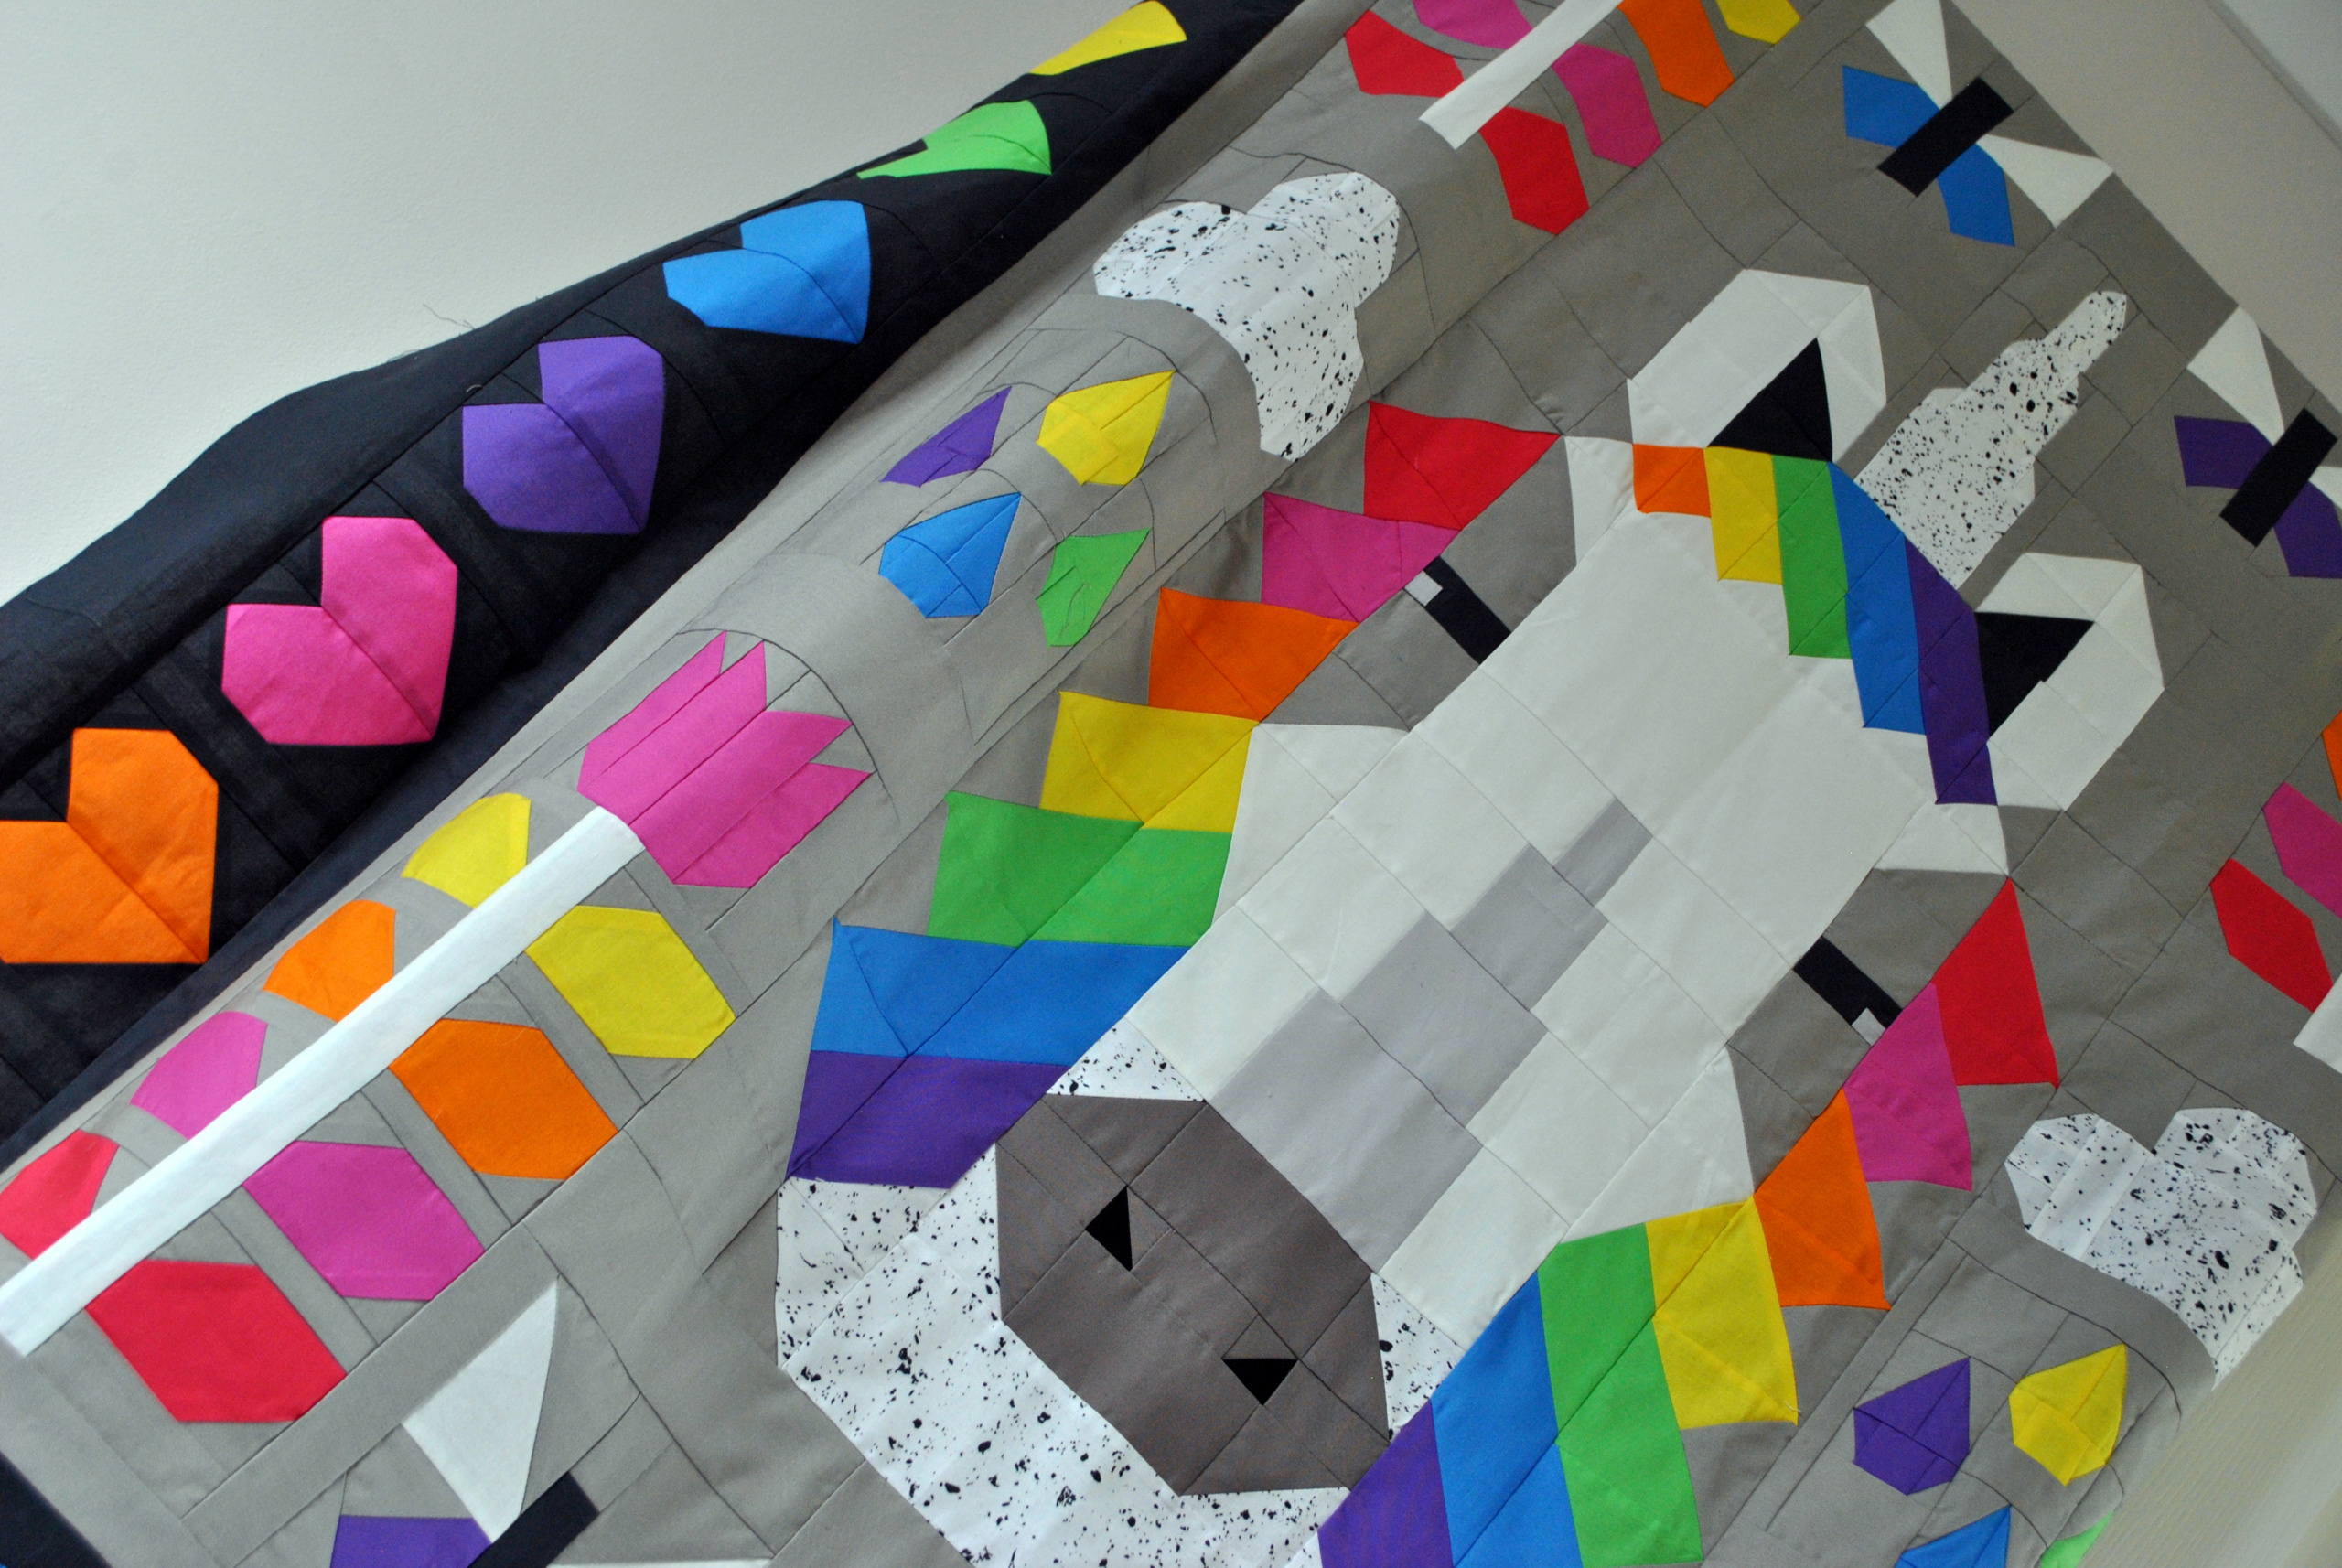
Over the last few months I’ve been working fairly intensively on a quilt pattern (in between full time teaching!) I’ve been wanting to design a quilt for years and my class of 4 and 5 year […]
Over the last few months I’ve been working fairly intensively on a quilt pattern (in between full time teaching!) I’ve been wanting to design a quilt for years and my class of 4 and 5 year […]
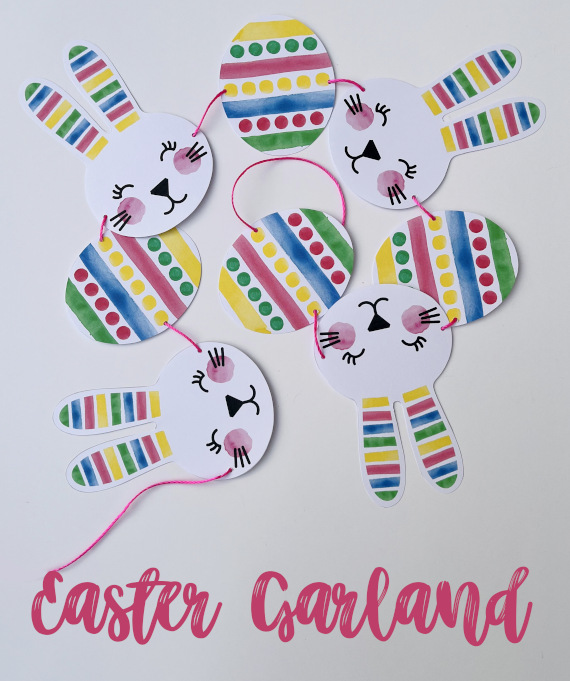
Welcome Spring with This Free Printable Easter Bunny Garland! Spring is finally arriving here in the southwest of England, and it’s the perfect time for some Easter crafting! We’ve created a free printable Easter Bunny garland […]
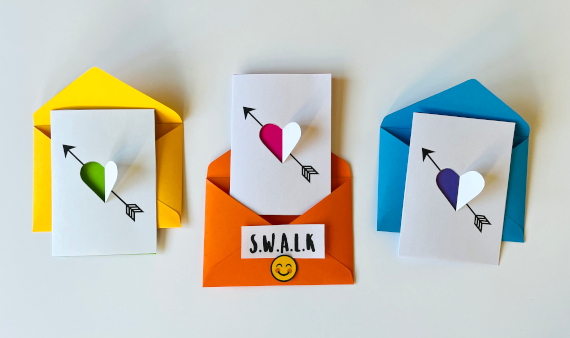
Are you sending a valentines day card to someone special this year? Valentines day is a bit of a contentious issue in my household. I am in support of it, but my husband isn’t. (He thinks […]