Hello! I’ve just revamped my confetti wrap for Paperchase and have come up with this fruity version – perfect for summer. Nip over if you want to get the templates and read the how-to. We’re counting […]
Hello! I’ve just revamped my confetti wrap for Paperchase and have come up with this fruity version – perfect for summer. Nip over if you want to get the templates and read the how-to. We’re counting […]
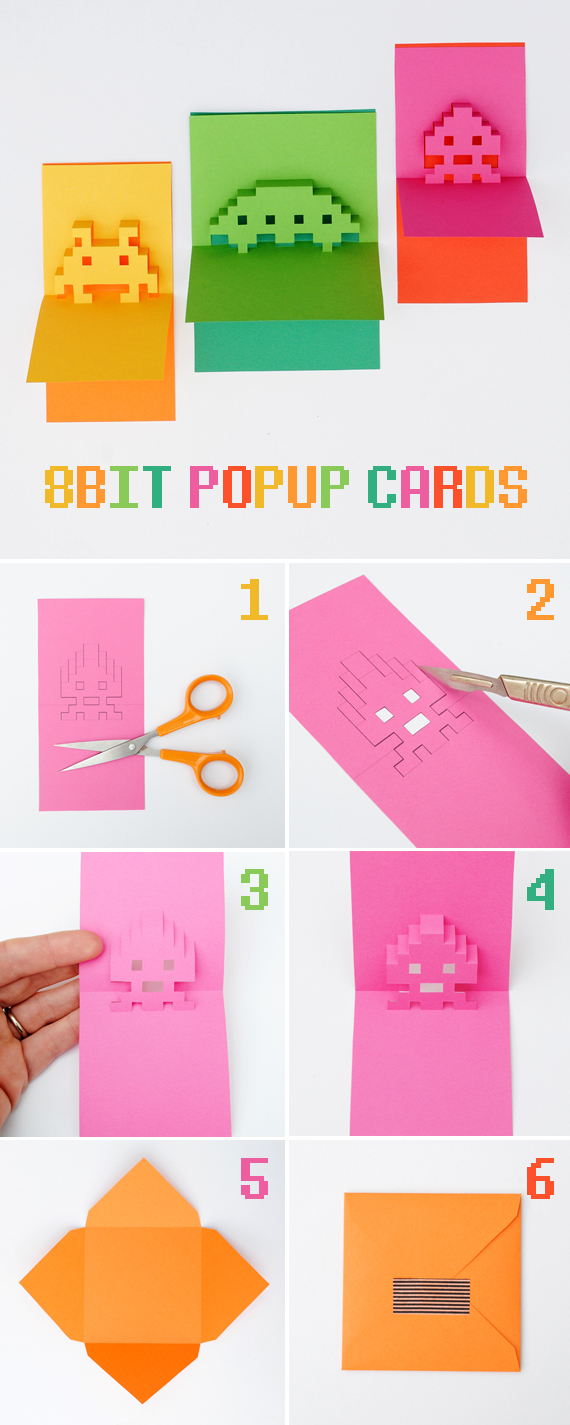
Happy Friday all! Did you know that Paperchase have got a new blog? I have revamped my 8-bit card tutorial just for them. Nip over if you want to get the templates and read the how-to.
When my boys were younger they used to love making little letters. I’ve put together an all-in-one envelope template and play stamps in the hope that it might inspire a little one that you know to […]