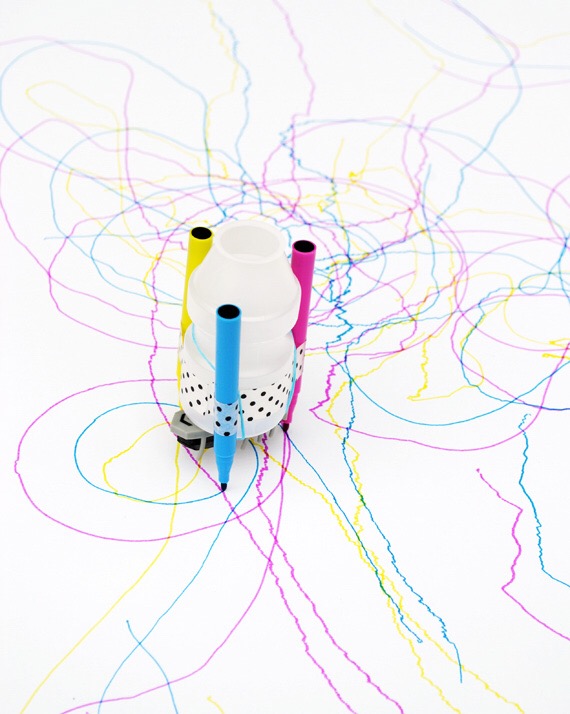
Hello! I saw this lovely post by hello wonderful and really wanted to make a draw-bot but the vibration motor and coin battery holder were expensive and not available in the UK. My sons and I […]
Hello! I saw this lovely post by hello wonderful and really wanted to make a draw-bot but the vibration motor and coin battery holder were expensive and not available in the UK. My sons and I […]
Hello there. I hope you all had a lovely summer. My children are back at school and I returned to work a few weeks ago so summer seems like a distant memory – I even had […]
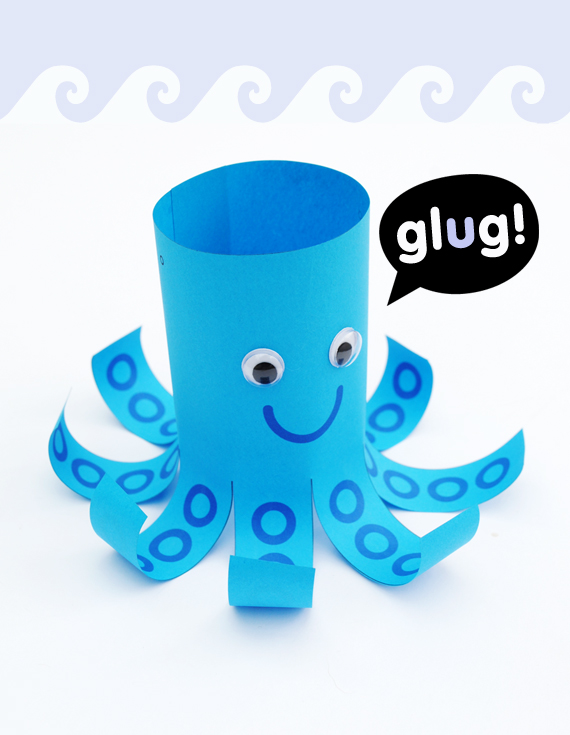
Hello there. I hope you are all enjoying your summer (or winter if you are south of the equator!). I saw this toilet roll octopus and it inspired me to put together this quick paper craft. […]