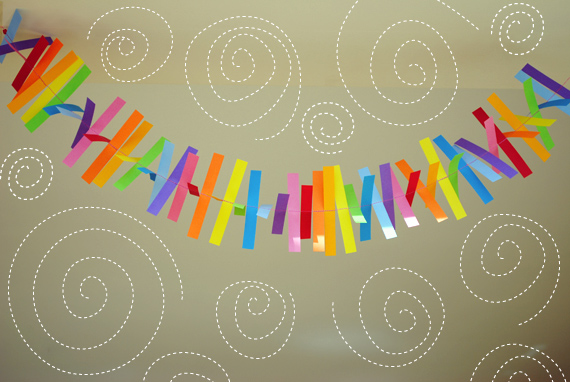
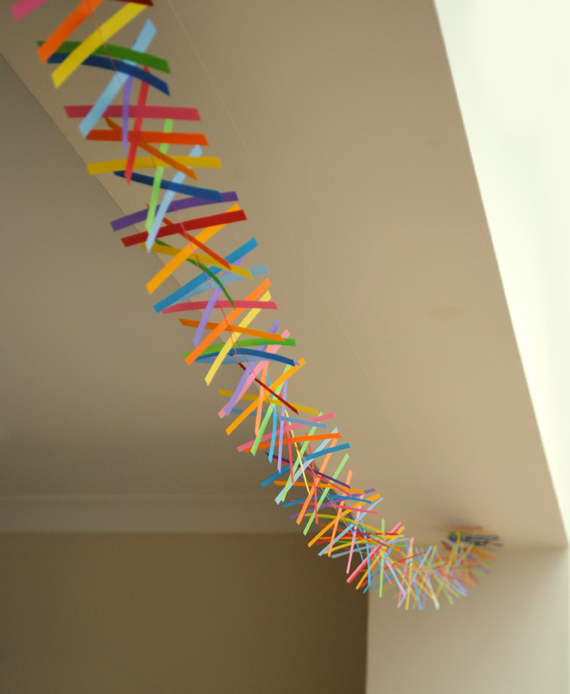
I made this rainbow paper garland on a grey summers day and now the days are drawing in it’s really coming into it’s own and doing a wonderful job of brightening our home up.
It’s really easy to make and costs next to nothing but you’ll definitely need a sewing machine and a couple of hours worth of patience. I took hundreds of photo’s of this and none of them do it justice – please believe me when I say it’s stunning!
Click the “read more” link below for a really quick how-to.
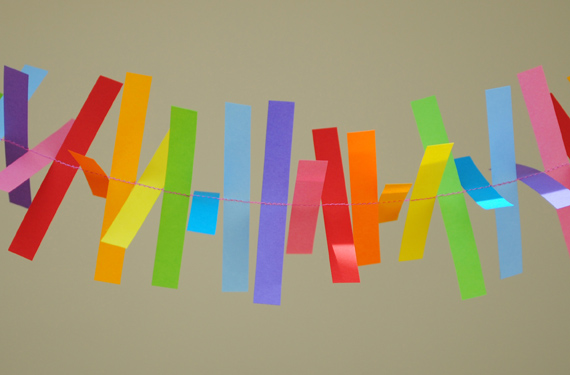
All you need to do is cut lots of strips of paper and sew along the centre point. Mine measured 8 x 1cm. Make sure you mark the halfway point before cutting your strips out and then you’ll know where to sew.
How to
You will need:
♥ Paper
♥ Thread
♥ Sewing machine
♥ Craft knife and cutting boards (or scissors)
♥ Ruler
♥ Pencil
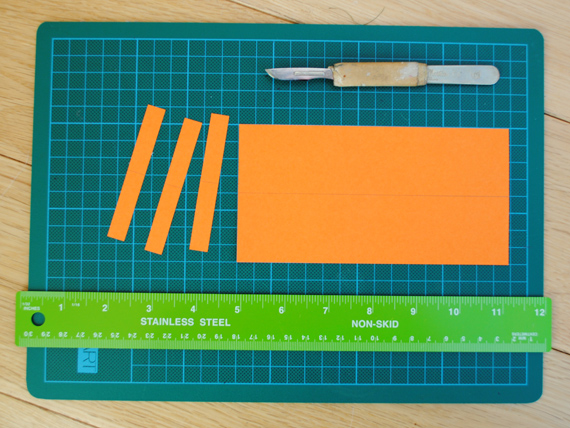
1. First you need to begin by cutting lots of strips of paper. I used a craft knife and cutting board to speed the process up. My strips measured 8 x 1cm. TIP: Make sure you mark the halfway point before cutting your strips out and then you’ll know where to sew. You can just about see the line on the picture below!
The paper I used was from a paperchase notebook. I can’t find mention of the weight of the paper but it wasn’t that heavy…….I would say about the same weight as the regular white paper you would put in your printer.
2. Then you just need to sew. I simply fed the strips into the machine one by one. I thought it was going to be a bit tricky but it wasn’t at all. Occasionally I ‘dropped’ a stitch between the strips but this didn’t seem to make any difference to the end result.

That’s such a simple idea, and so beautiful!
That looks fantastic!
please show! I have your owls up in our school room and have some ready as a gift….they are amazing!
Thanks for the lovely comments. I’ll get a more in depth tutorial up in a few days. It really is a great garland and the perfect antidote to the miserable weather we are having (in the UK anyway!). Sheryl I’m really thrilled to think my owls are hanging in your classroom – very cool!
Please show us how to!!! This is so cute!
hi there…very cool…what kind of paper do you use?
Love this garland, I’ve been looking for something to personalize my classroom and now I’ve found it!
This is wonderful! You really have a gift to make simple things extraordinary.
I have made one to hang over my 2mo grandson’s cradle. We’re hanging it vertically and we left a tail so we can “wind it up” and let it slowly turn over his head. He’s loving it!
I have made a second one punching large and small shapes out of 2″ squares of colored cardstock. We’re sewing the punched out shapes into larger shapes as dangles or as the centers of negative spaces.
This is a certifiably awful photo but it’s late and my camera (and skills) is pretty pathetic and the only adequate light is on the hood over my cooktop. At least it illustrates what I tried to describe. http://www.flickr.com/photos/75667634@N00/5112399941/
Anyway, THANKS for a wonderful inspiration!
oh these are so beautiful!!! Thank you for sharing!!!
Hi Jenny, Its just regular paper….I got mine from an ordinary spiral bound notepad (paperchase I think).
Hi Rainey. Thanks for such a lovely comment. Your garland is fab. Thanks for posting the pictures on your flickr site. I’d love to see the one you hung above your grandsons cot. No worries about the photo – most of mine are awful too – I just make sure I take hundreds and usually one or two turn out – haha.
For those that have requested it I am still going to do a ‘how-to’ – we’ve all been struck down by a cold this week so I have been stuck to the sofa more than usual!!
That is the most cheerful thing ever – am going to make a couple to string across my quilting room ! Thanks for this
I love this. So cheerful!
What delightful project/idea/photo. Eye candy. Thanks for sharing this.
How very pretty 🙂 … thanks for sharing
The garland is great. I will definitely try one as well.
Greetings from rainy Scotland
Shippy
This is fabulous! I am totally stealing this idea for my girl’s rainbow party!!!
thanks so much for the inspiration! I made one already, it’s here: http://papierenavonturen.blogspot.com/2010/10/slinger-garland.html
Hi Dymphie…I love your garland. The marbled paper works so well. It’s lovely to ‘meet’ your blog too!
Thanks to all for the most wonderful comments. 🙂
Love your garland! Wondering what type of paper ie. the weight you used. I would love any details you could send.
thanks
Hi Melodie,
If you click on the following link you will see the paper I used to make the garland.
http://www.paperchase.co.uk/notebooks/spectrascope-a5-notebook/invt/00355852/
It doesn’t mention the weight of the paper but it wasn’t that heavy…….I would say about the same weight as the regular white paper you would put in your printer.
If you have any more questions then just yell.
This is such an amazing project! love it 🙂
ARE YOU KIDDING ME?!
This is fabulous. Lord, how I love this project! It’s so happy and delicate and beautiful and childlike….but not so childish that I wouldn’t hang it in my bedroom or office.
Ooooeeee, I can’t wait to try it out! Thanks for sharing!
I would love a tutorial! I think I can mostly figure it out, except, how did you line up your papers to sew through them? Did you tape them, or just feed them through one by one?
Hi Sara, I’ve added a quick tutorial to this post now. With regard to your question I simply fed the strips into the machine one by one. I thought it was going to be a bit tricky but it wasn’t at all. Occasionally I ‘dropped’ a stitch between the strips but this didn’t seem to make any difference to the end result.
Great idea!!
You could glue it from both sides, than cut it of after sewing …
Glad it worked out well Sonja. I made my rainbow garland in the summer and it looked so wonderful swirling around in our sunny back room. The photo’s really don’t do it justice!
Will be making a couple of these for my son’s bday party. What a great idea. Thank you!
I have just featured your garland on my blog.
Thanks for sharing !
Thanks Virginie x
Thanks for this tutorial! I used it for my daughter’s baby shower… not pastel colors! and it turned out great! I used my paper cutter for quick cutting. Here it is…
http://toysandgames.blogspot.com/2011/03/paper-garland.html
It was so easy especially when the colors you need aren’t typically available!
Hi Shari, the colours look fab. Hope you found it easy to make? I’ve put your link in my ‘you create’ blog list. Hope this is OK! Cheerio for now…
Wow, this is amazing. Just love it!
Hi Christine – no problem at all 🙂
I love it! So simple and adorable! 🙂
I love love love this!!! So adorable…I cant wait to try this!
OMG I love this! Thanks for sharing.
It is really a great idea, i like it very much! You can spend time with your kids cutting the stripes and have fun and it is also a really cheap decoration for parties etc. Really Great!
I have to try this! Looks lovely and seems easy to make. I’ll just have to find some nice paper to use. (I live in Sweden so the delivery rate if I’d order the notebook you suggest would be ridiculous 🙂 Anyhow, I found the paperweight under “details” on your link. It’s 80 grams, so your guess about the printer paper was correct.)
Hi Eva…yeah…I think most paper would do. The only kind of paper i would avoid would be sugar paper (construction paper) just because it curls and faded easily.
Good luck!
Hi Kate, I was thinking of making this for outdoors, it looks fantastic. Do you think it would be strong enough to hold up in the breeze? Did you use a heavy cotton??
THanks
E
I ♥ you blog!!
Congratulations from Mexico 🙂
gracias amiga por estas ideas!!
Hi Elizabeth…sorry for the very late reply on this one. I used regular cotton. Not sure if strong cotton would work with regular paper but may work with thin card. I think it would hold up in the breeze but be aware of any raindrops!
Thanks lizeth 🙂
Perfect for a summer party, thanks for sharing !
You could but it would take an extraordinary amount of time. It would probably be easier to tape the string to the paper instead.
Hi Nikki. Lovely to hear your story ^_^ I’m sure your niece will love it.
I have to say that I am a sewing novice too! I fiddled with the stitch length so that each strip had about 3 or 4 holes in it (from the needle).
I tried not to leave a gap between the strips but occasionally I ‘dropped’ a stitch (the needle went between the strips) but this didn’t seem to make any difference to the end result.
You can also try sewing on plain piece of paper beforehand, in order to check the stitch tension. If it is producing nice stitches and not crumpling the paper then no need to adjust.
It’s a bit trial and error really but I am sure you will get there. Once you have it sussed you will be surprised how quickly it comes together.
Do let me know how you get on ^_^
Thanks! I plan to use all the colored paper my 2,5 year old daughter drew on. A lot of them are not really worth saving, but this makes them very useful still! #repurpose!
Thanks!!! I did it with cardboard and it’s stunning!!!!
Hi Kate,
Thanks for your great advice! I did some experimenting and the garland worked out brilliantly! My sister (and niece!) loved it 🙂 I’ve now made one for my classroom and they children were really ‘wow-ed’ by it. It looks so bright and cheerful!
Thanks again for you help!
Nikki x
Yay…glad to hear it went well ^_^
Well done Madeleine ^_^
Brilliant, am definately going to give this a try.
You could use a rotary cutter and acrylic ruler to speed up the cutting process. Great project!
Love it! Thanks for the tutorial 🙂
I want to know if the paper was that thin like print paper.
I’m from holland. Maybe it’s diverence…
Hi. It was normal printer paper. Any good quality paper is fine.
Hello, it’s very nice the paper garland, I call them in Holland: papierslingers…I want to make them cause my very dear daughter is going to be married on 13 December this year (2013) 19 years old is she.
I want to make joyfullgarlands! Thanks!
Good luck with the garland making. Hope the wedding is wonderful. Kate ^_^
Vinç Platform ve Asansör Kiralama İzmir