Hello! Sorry about the little break. My son has been off on his half-term holidays so I had a blog-free week!
Now I am back, I just want to give a big shout out (and a big thank you) to my new sponsors, pi’ikea street and paper glitter….do check their sites out!
I also wanted to say a massive thanks to all the people who have left comments lately (and to those who have sent me lovely emails). It’s been especially great to hear from people who have been making the projects…and ace seeing all your pictures…hurray!
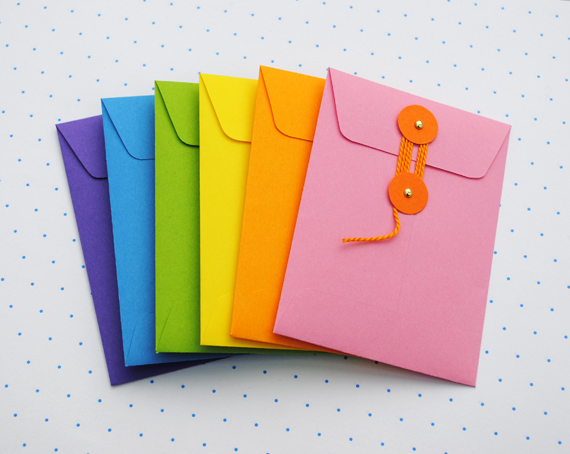
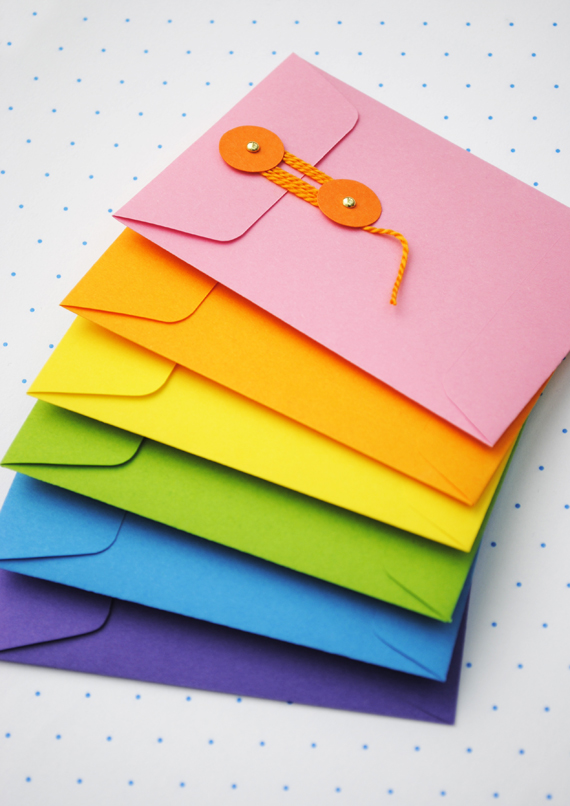
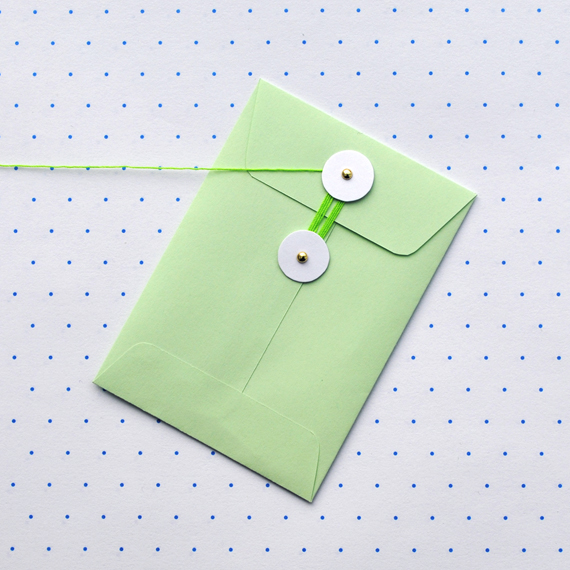
I do confess that I have always had a ‘thing’ about string-tie envelopes. They seem impossible to get hold of though so I thought it would be fun to make my own. They are very easy to do!
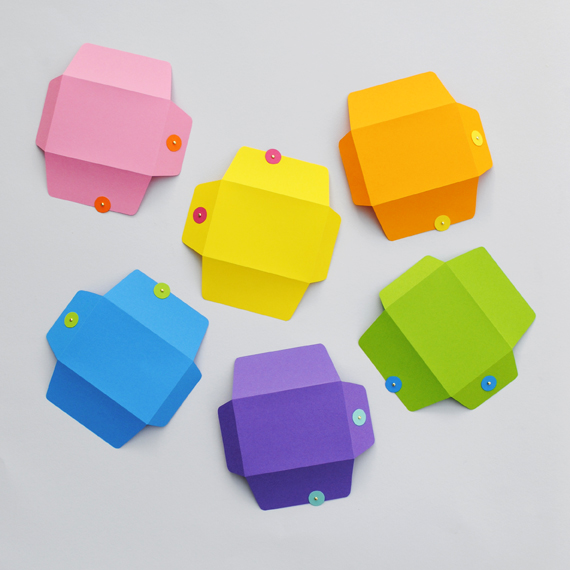
These dinky little envelopes are great for all-sorts of things (storing paper ephemera, housing invitations/gift cards, storing seeds). I have also been making some for my sons to play with (as they are obsessed with letters/post offices at the moment). I reckon they would also make a cute gift.
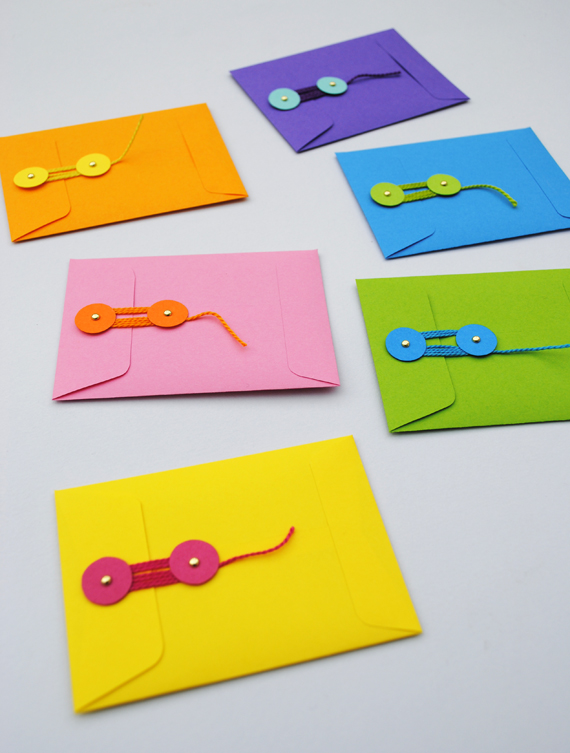
By the way, now my kids are getting better at using scissors they have been really enjoying making their own envelopes using the template from my previous post.
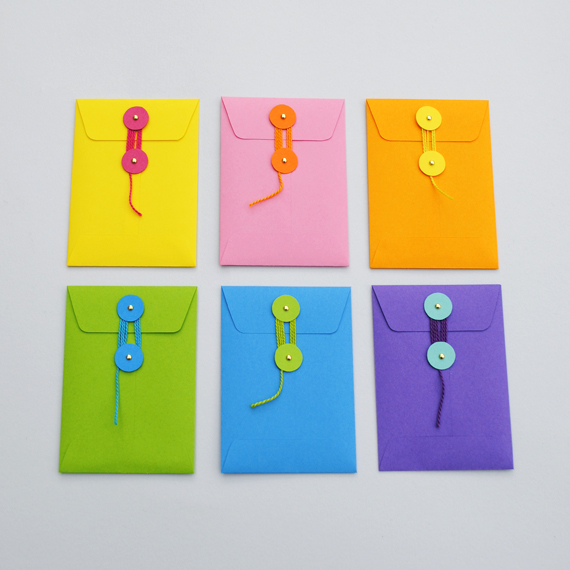
You will find a full tutorial and templates below! Happy Monday all 🙂
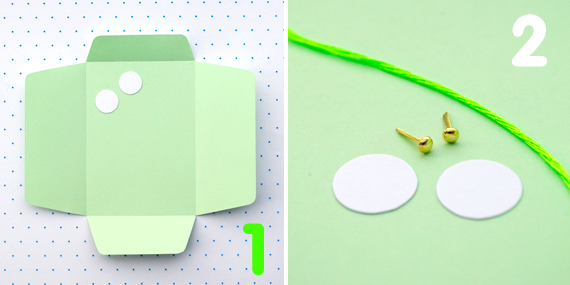
You will need:
Paper
Card
String
Glue stick
Scissors
Tiny brads/split pins (the heads of the brads I used were 3mm in diameter)
How-to
1. Print out the template onto paper. Cut score and fold.
Template one (tiny envelope, print out on A5 paper)
Template two (C7 envelope, print on A4 paper)
2. Cut out some small, card disks. Paper will work just as well but card will be a bit more hard-wearing.
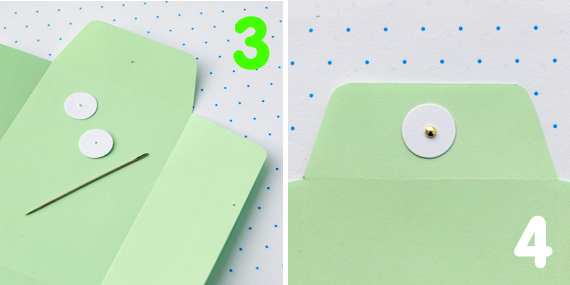
3. Using a needle, pierce two holes in the envelope and a hole in each disk (marked on template).
4. Attach card disks to envelope using brads. (If you don’t have any brads then you can sew them on. See this tutorial at simplymodernmom.com).
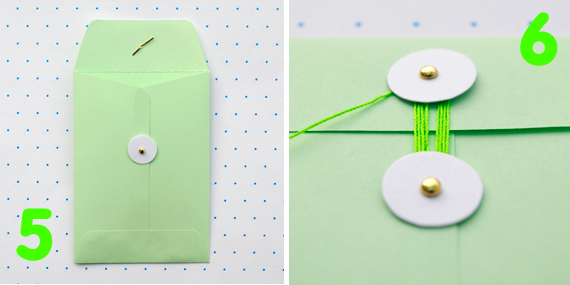
5. Fold the three edges of the envelope up and glue.
6. Attach a piece of string to the top disk and tie off. Wrap round disks to fasten.
If you are not keen on the rainbow brights then I think pastel/neon would be a great combination. For example, make a pale pink envelope with neon pink disk and string. (Note to self: must buy neon card/paper!)
Job done!

very very nice! thank you! 🙂
Eek! This is the perfect way to wrap those train tickets to Luxembourg I just bought for my boyfriend and me! I may have to attempt to adapt the pattern to fit the tickets, I’ll let you know how it goes 😛
Thanks for the tutorial, they are super duper cute!
Megan xx
…oooh sounds lovely Megan…hope you and your b/f have a great trip! The envelopes are pretty small. If you need a larger template posting then do yell!
Thanks for this great tutorial and for the useful templates ! I’ll probably use them for regular envelops too !
I am also interested in where you get your beautiful paper….is it card stock? I live in US and regular craft “construction paper” is not of the best quality….scrap book card stock is too stiff.
I love everything on your sweet site!
JennyAnn
Hi Anjie & JennyAnn,
The paper comes from Paperchase, which is UK company. It is available throughout Europe I think. The range is called Spectrascope.
http://www.paperchase.co.uk/stories/international-stores/scat/interstore/
If anyone knows of any supplier of bright paper (especially in the US) please shout out!!
Hi JennyAnne,
Answer just above 😉
Any tricks for cutting out your template? Yours look so perfect.
Just a pair of scissors…..
I (mis)use a small pair of embroidery scissors for all of my papercutting HTH 🙂
I love these! Thank you so much for the great tutorial!
Love, love this! Thank you
Amy, template one is meant to be printed on A5 paper not A4 paper so maybe that’s why you found it wasteful? I’ll post a new .pdf tonight (with 2 small templates on an A4 sheet 😉
Ahhh yes…I had labelled it incorrectly. All sorted now. Thanks for pointing that out. (Too much rushing!)
I love these string tie envelopes too! And the notion of using neons on these is brilliant….what is it about paper? It just makes me happy…
Hi Holly. Makes me happy too! Cheap, easy, accessible, requires no specialised tools, easily recyclable…ahh the list goes on.
I really need to invest in some neons…on the list!
Love this!! i am so making some!
Hi!
I love your blog:)
Any chance you could make a bigger template that would fit a standard postcard size card?
I have also loved string tie envelopes, just not the boring color. Now I can make my own stunning array of colored ones, thank you!
Hi Caro…it’s called “DFN craft thread”…if you google it you will see it. It’s like a thick embroidery floss 🙂
Hi Liis,
I don’t think there really is a standard postcard size so to speak. Let me know your specific dimensions and I will see if I can fit one onto an A4 template 🙂
Paper Source in the US has bright papers.
Thank you for the great tutorial and the templates!
Hehe, sorry:)
By a standard postcard size I meant 10,5 x 14,8 cm. I hope you can fit it on an A4.
Hi Catherine,
A4 paper is just the standard sized paper that you put in your printer. I’ll try and post some additional templates over the weekend 🙂
These are awesome! I have made some similar envelopes, but not with the tie closure. I love these! Thank you so much for showing me how to make these. I do love my paper crafts. =)
Have you done any of the paper embroidery for cards? It is a lot of fun and I have gotten many many compliments on the cards that I have sent out.
I have always loved envelopes like this. Now I can make them!
its wonderfulllll !!!!!!!!!!!!!!
pleassssseee tell us more about all types of envoleps you know because now its my favourite website !\
Thanks so much for sharing the templates – too cute!
I love these!! I featured this on my blog, here: http://punkprojects.blogspot.com/2012/02/make-it-monday_27.html
-Katie
I too have a ‘thing’ for string envelopes, I love how colourful yours are!
Many thanks Katie
Thanks Radhika….my son and I have been ill so no new posts last week!! There will be a new tutorial up soon I promise…
Hi Debbie…thanks for the message. Paper embroidery definitely on my list. Have been trying a few things out over the last few months but nothing good enough to post!! Next week I may have another stab at it and see what I can come up with!
Do you have a blog? Would be nice to see your examples!
Ooooh thanks for the tip Candice…they look great!
My gosh, that is a-dor-a-ble! I love, love, love it! Love your colors too, and the way you keep them so consistent throughout the site. Did I say that once before? Well, it impresses me every time.
I also love string envelopes. I made a little string-envelope-style box coming up near Christmastime last year. Not as brightly colored as yours — for fun, mine were kind of military (I’m a trumpet player in the Army Reserve).
You brightened my day! Thanks!
Splendidness in squares!! Can’t wait to try out on my own. But what would be other options than using split pins but still gives a finished look? Thanks for sharing the tutorial!
i loved it a lottt !!!!!!!!!!!!!!!!!!!!!!!!! i love alllll… the colourful things n i made these envelopes too ! its just Fantastic
love this! thanks so much!
Made these today using printable papers!
http://www.cuteanduseful.com
hello! i wanna know what type of paper do you used to have the envelope shape cut out. and what do you mean byy card and paper for the materials needed. thanks!
These are so lovely!
Had to share: http://minipiccolini.com/2012/03/its-friday-9/
Thanks for the tutorial! love it- and love the colors you used as example!
Wonderful tutorial and templates! Thank you so much for sharing!
these are gorgeous and cute
muchas gracias Alicia
I love your blog!
my daughter loves your tutorials!!
Saludos desde Argentina!
Love your template!!! The colors are what had me sold!
I have a card that’s basically one quarter of an A3, so basically 210×148.5 mm (approximately, of course). Do you think you could make a template for that size? (It’s either that and spend the evening cutting envelopes with friends or shelling 100 bucks for plain white envelopes. I’ve done the math…. 🙂 )
Would be super appreciated!
xoxo
These are perfect for lost teeth under the pillow to the tooth fairy! Wish I found this yesterday when my son lost his second tooth LOL! Will be making these for the next ones!
Good idea Lauren. My little boy eagerly anticipating the loss of his first tooth!
Where is the template that we have to print out on the paper?
The link is just under the ‘How to’ section ^_^
Great DIY ,very cute.Thanks for sharing.
I cannot help but notice that the envelope in the tutorial has the two flaps overlapping in the middle of it, right below the button, whilst the envelopes shown at the beginning of the post seem to have an uninterrupted piece of paper holding the button. Were they made using a different template?
The joins are there…just hard to make out due to the light conditions…you can see the join on the pink envelope in the top picture….and in the purple envelope fourth picture down.
Thank you very much for the templates! I will try and trace them to use on my Silhoutte.
Hi,
I found your beautiful blog whilst searching for an envelope tutorial, and I have to say, this one is very lovely!
I was wondering if you got such small brass fasteners over at Paperchase as well, or somewhere else? I could only find the large ones at Ryman’s and WHSmith.
Thanks so much!!
Hi Oni,
I actually got mine from WHSmiths but it was about a year ago (it was quite a big branch). You could try hobbycraft or ebay. Good luck hunting them down ^_^
Hello, thanks a lot for this fabulous tuto! I am a swiss illustratrice and I use your tutoiral to make a gift from my 4 year old daughter to her mamini.
I love your blog!
Thanks Sophie ^_^
many thanks! I love!!!
Hi Ann,
A4 is regular printer paper. Click here for more info on paper size::
http://en.wikipedia.org/wiki/Paper_size
Thanks so much for sharing ! I love these envelopes!
I’ve only just subscribed to your wonderful blog and I notice that in these comments, there are envelope templates for other sizes mentioned …. one per A4 and two per A4. Is there an archive anywhere where I could see these please? I’d love to make some for my jewellery at a Christmas craft fair …. is that ok? But the bigger 1 per A4 would be fantastic for a fine necklace. I LOVE your owls too. Thank you!
Thank you so much!!! It’s so cuteeeee <3 Love it!
These are so cute, thanks for the envelope template!
Thank you so much ! It seems easy to do but I had no idea of how to do it without your explanations !
Alors Merci (de Paris)
My customers asking me where I get so beautiful envelops and I dont know if it is good to tell them about 😉
what kind of string can u use
Hi Daphne, I don’t have one. Sorry. I hope to get a standard set of envelopes on the site soon but short of time at the moment. You should give it a go. They are easy! Make one from a piece of card and then use it as a template to draw around. Let me know how you get on. Kate ^_^
perfect for the next party invitation, my daughter is happy with the idea
Thaks
What darling and colorful envelopes. I too am a fan of the string tie. Also great storage for die cuts.
Thanks for the profect. Lilaha
thank you for sharing this…. will come in handy!!
Love them, found it well in time for my daughter’s valentine’s dya goodie bag.
Wow! I can’t wait to try these for Easter in fun colors, eggs & bunnies 🙂 Thank you so much!
love this!
Hey! Could you do that larger template posting? I’m looking to make them around the size of a normal sheet of paper to ship save the date and invites to our wedding in! 🙂 Thanks!
Thank you for sharing — these will be great for scrapping as a spot for extra photos or journaling or memorabilia.
These are beautiful little envelopes. I bought some last week and they were quite pricey. Now I’ll be able to make my own and in such beautiful colours. Thank you.
Awesome! This will certainly help me at school for my WWII Project!
Thank you for these terrific envelopes. I place a single tea bag in them and send them to special friends along with a card. I made mine in neon colors. They are great.
so cool:)
just asking but how long in cm is the first envelope template
Thank you! I have been looking everywhere for this! 😀
Great idea! The colors are so nice! Thanks for sharing. 🙂
Que bien, es genial !! Buscaba este tutorial !! Gracias !!
Thanks very much for posting this…saw a minialbum that used the envelopes with a link to here…
Thank you so much for sharing these wonderful envies! I really like the colors you used – they are so soft and pretty!
ne diyonuz la
Hello Kate,
Wonderful DIY-tutorial!
I wonder if you could help me with a template of the measurements for making an envelope in the size of a4?
Please answer to my email in that case. paulinematika@gmail.com
Thank you for your time.
Kindest regards,
Pauline Matika
Hi Pauline,
I’m so sorry but I am not able to make bigger templates. The best advice I can give is to take an A4 envelope apart and trace around that to make multiple copies.
Kate ^_^
Kate, many thanks for these mini envelopes! I have had a nightmare trying to find some. I make mini books & needed 32 of these guys for my next project. ♥
I love these, I’m going to make some to take to Disney with us for the parking money
I like those and definitely will try it out this weekend for my creative sketchbook cos collages and bobs are everywhere so your idea is solving my problem as well as trying to be more organising better this time 🙂
LOVE these little envelopes….I have given them with gift cards a few times I decorated them beautifully and they were much appreciated!
Thank you
kissy!.. simply kissy.
Yes, I’m doing Save the Dates, too, and these are fantastic!! If you a larger template, I would be quite appreciative!!! ~s
Excellent pieces. Keep posting such kind of
info on your page. Im really impressed by your site.
Hey there, You have done an incredible job. I’ll definitely digg it and individually suggest to
my friends. I am confident they will be benefited from this site.
Thank you for this marvelous tutorial! I am running out to my craft store now to get my supplies and start making these. I have plain envelopes already made, but I want to attach these so that I can open and close them without permanently sealing. I love your paper crafts! I have some DIY posts on my blog too if you ever want to check it out! http://www.jleeblog.com : )
Wonderful envelopes, I’m definitely going to try them but…how to fix the string to the top disk? do you use glue?
Thanks for your help!
I love these…perfect for a Smash Book or a Baby Book…both of which I am currently either making or adding to! Thank you!
Can you use card stock paper? I’m not artistic and this looks simple enough for someone like me…I hope.
Great and lovely envelope. I can also make tie gift envelopes last year and it was looking awesome. Great idea! The colors are so nice!
thanks for your sharing
the information is really useful