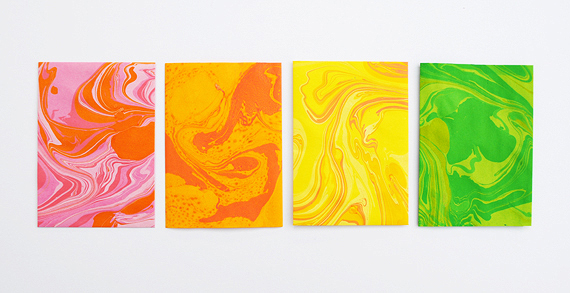
I saw these chocolate wrappers on Oh Joy ages ago and they completely changed my mind about marbling (I always used to think marbled paper looked a bit dull and assumed you needed loads of equipment).
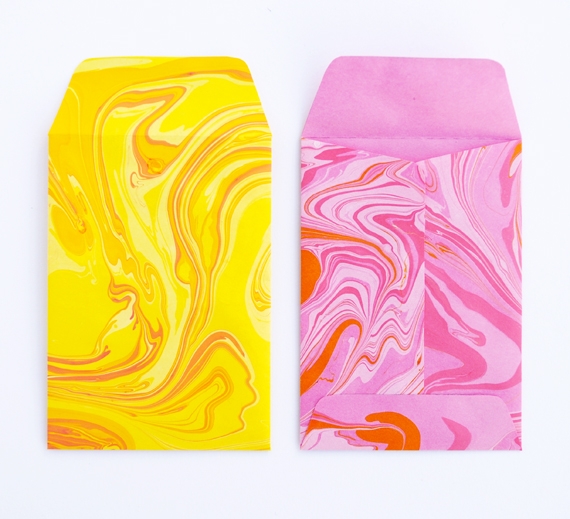
It turns out it’s not so hard…and the results can be really colourful (Yay!).
HOW-TO
– – – – – – – –
You will need:
// Marbling paint. I used Marabu Easy Marble (not a sponsored plug!)
// A tray (I used a recycled foil food container)
// Paper (make sure it fits inside your tray)
// Water
// Cocktail sticks (a twig will do!)
// White spirit for cleaning up (or cooking oil…see comments section below for details)
// Newspaper
// An old top or Apron
STEP-BY-STEP
– – – – – – – –
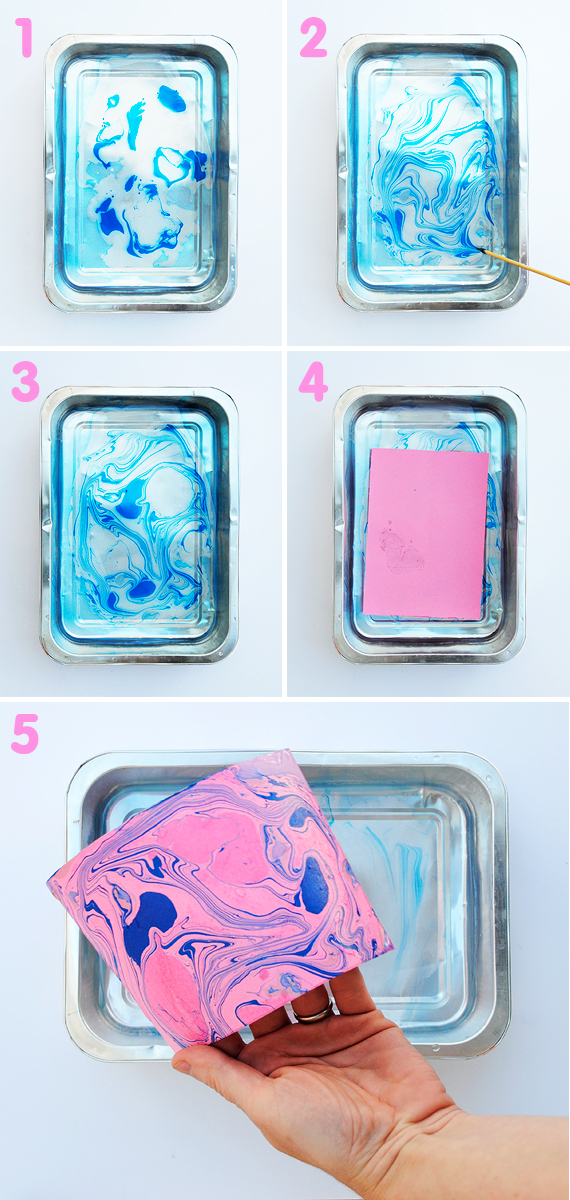
1. Fill your foil container with some water….a few inches is fine. Then pop some drops of marbling paint onto the water. Limit your palette to three or four colours.
2. Give the water a swirl with a cocktail stick.
3. Shake a few more drops into the water if you fancy!
4. Once you are happy with the pattern gently lower your paper on top of the water and leave it for a few moments.
5. Then carefully lift the paper off the surface of the water.
6. Pop your design, face up, on some newspaper to dry.
HINTS & TIPS
– – – – – – – –
- Use a scrap of cardboard to ‘scrape’ the top of the water in-between each go. That will get rid of any paint residue from your previous attempt.
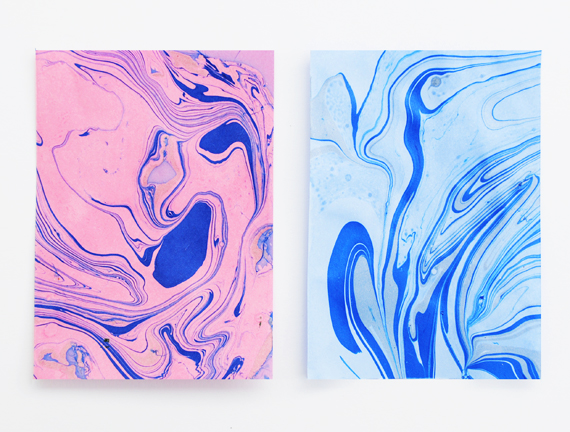
- I used coloured paper. Because of this, one of the marbling colours I chose was a transparent colour (crystal clear), that way you get to see the colour of the paper too.
- If you are doing this with kids I would definitely recommend using some gloves and an apron…it gets a bit messy.
- Have fun!! I found marbling incredibly relaxing so grab a bit pile of paper before you start…you will get through it.
- When your paper has dried, press it under some heavy books to make it flatter & smoother! Make sure you sandwich it between greaseproof paper just in case it leaves a mark.
- If you want some more inspiration then check out my Pinterest marbling board ^_^
- This particular marbling paint is oil-based so you will need white spirit to clean up any spills.


I did a paper marbling / book binding workshop in high school and it’s still one of my fondest crafty memories, even 15+ years down the line.
We marbled with acrylics as well, though you have to float those on water that’s been ever so slightly thickened. I vividly remember pulling a hair pick through the paint to get a scalloped effect, and can picture that singular piece of paper easily now.
I don’t have as fond memories of oil-based marbling, but your results look fantastic, so I think I’ll definitely give it another try!
When you mix your colors, just be sure NOT to mix complementary colors because they aren’t. Red/green, purple/yellow and blue/orange will create a brownish neutral.
Hi Susan,
Thanks for such a nice comment. I’ve been trying acrylic based marbling too…I have been making my own liquid starch to float the paint on but think I’m going wrong somewhere as the results aren’t that great. I’ll keep trying and see if I can come up with the perfect recipe.
My son, who is not at all crafty (!) came home from school very excited after doing some marbling which is why I decided to give it a go…it is very addictive ^_^
Thanks Susan ^_^
Thanks for the message Betsy…the shaving foam idea I have seen before but not done. It’s on my list! Good to have the recommendation 😉
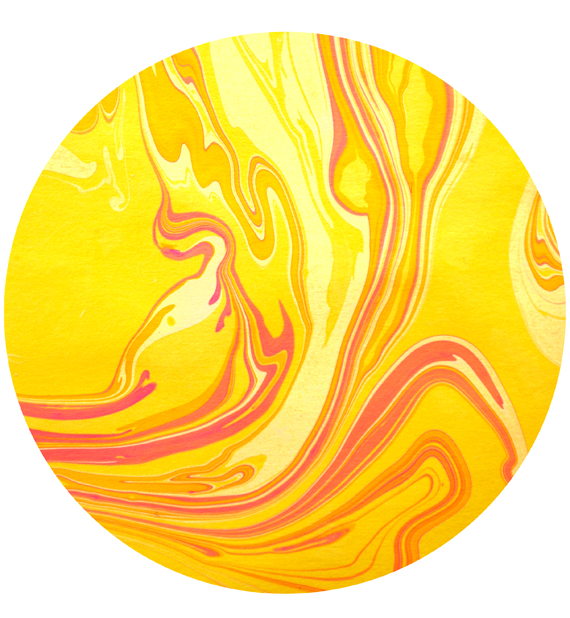
Yeah I liked the circles….they have a bit of a 60’s groovy vibe going on.
Thanks for stopping by ^_^
oh this reminds me of my childhood!
& i want to try it again!
thank you for the lovely tutorial!
Love the shaving cream method. Your oil method sounds really interesting. Must find paints first. Any suggestions?
I just used the shaving foam idea. The foam is cheap but the food coloring is expensive. It turned out great but not as good as yours. I will have to try it. Also I never thought to use colored paper. Will have to try that next time.
Hi,
this looks brilliant and really makes me want to give a try to marbling again too!
A hint for cleaning up oil paint: Just use sunflower or other food oil and clean up the paint with some kitchen paper. Clear oil residues you then clean with a sponge and some soap and water. This needs two steps but is much healthier for the skin (unless you use gloves) and less smelly than working with white spirit or other solvents. Works well for oilbased blockprinting paint too.
Thanks for the top tip….I never wear gloves (but probably should) so this is really useful to know ^_^
Hi Laela,
The link to the paints is in the ‘how-to’ section just above ^_^
I saw something similar to a stree show artist, where the guy was doing some abstract drawings using spray paint. The result was really great, since he was using shapes to make the drawings, and one of it was mother earth, having above two big stars. Amazin result ..
Great tutorial, looks much simpler that I’d of expected!
Kate, this is wonderful!
I had been considering this (memories from after school care, we just actual marbles to move the paint around, i’ve heard this is good to develop kids fine motor skills) for ages, thank you for directing me to the right products to use.
Perfect for christmas presents I say!
Laura
Thanks Laura ^_^
What a neat idea- and such a great tutorial! And by the way, best color combos ever! Im going to give this a try- and ill let you know how it goes 🙂 Thanks for sharing lovely xo
I use suminagashi inks in my classroom to dye paper. Zero mess, bright colors, and $13 worth of ink can make hundreds of prints! You can buy it at dick blick or sax 🙂
Thanks Elyseb,
I had read about these inks and heard they were great…really hard to get hold of in UK…but i just saw some on ebay so might give them a blast. Thanks for stopping by ^_^
Beautiful! I tried the shaving cream method, my daughter loved playing with the foam and mixing the colors, but the marbling paintings were horrible. Would love to try your method next time, love the colors!
This is just beautiful.I’ve a friend who done some of these papers with hers daughters & when dry she matted & framed them. Turned out Great!Never would have thought they ere this easy!
Thanks Suzette ^_^
I invite you to Turkey.
Your results are wonderful. However, I looked into this product and it says the inks are water soluble and not waterproof or water resistant after drying. Do you fix your paper products with anything afterward?
how do you marble on leather?
I have been trying to figure out the best way for ages!
I am aware it is best to find leather that had not been sized and doesn’t have wax and starch on it’s surface. Is it possible to marble on leather that has been sized, starched and waxed and still achieve great results?
Would so appreciate your feedback!
xo – KK
or rather, how can i remove these chemicals from leather?
thanks!
Hi KK….sorry for the late reply. I’m afraid I have never marbles on leather before so have no experience to share. I have never worked with leather in any capacity so couldn’t even hazard a guess. Good luck…I hope you find some answers. Kate ^_^
I read another way to marble your water by using spray paint in the water then following the rest of your instructions
I would love to learn more about marbling leather. Please contact me as I really am interested in marbling leather.
Your work is beautiful!
Check out Dharma Trading for the right supplies with Acrylic Marbling. They have the recipe, too.
Good luck!
Jenny
Yes, this technique is so good ! I love very much
thank you
Hi – just a quick question. My marabu ink seems to be kind of gloopy when it’s sitting on the surface of the water. Do you think it might be because I’ve put too much in? I find it hard to control the amount that goes in with the nozzle type thing that the marabu ink comes with… Cheers! (Really lovely work by the way)
Yeah – I found it wasn’t a precise art. It was marbling on a budget so i guess not perfect. I found after a while that it is better to agitate the water slightly to get the swirly designs rather than pull a toothpick through it.
Dear kate.
I just ordered the marabu colors. I am using them for a workshop on an indoor design market. And now i just got a bit worried about the smell – do they smell a lot? i was not aware that they are oilcolors till now.. I did it recently with nail polish and that was REALLY bad in terms of the smell.. :O
another thing: now that it is oilpaint – i guess I can use any kind of paper? With the acryllic its more impirtant that its watercolor paper.
Kind regards Lisbet Kroll
Great tutorial Kate, Thanks for taking the time to write it – I’m sure many will benefit from your shared knowledge! FYI, I used it as a reference on a recent paper marbling tutorial I did myself a week or two… http://www.ibookbinding.com/blog/marbled-paper-bookbinding-tutorial-and-photo-gallery/
Keep up the good work and again, many thanks!
~ Paul
I prefer using liquid watercolor with the shaving cream marbeling. It is cheaper and the colors are so vibrant!
I haven’t used this brand, but the oil based one I used responded well to using the wooden end of a paint brush. They are coated, so maybe that helps prevent too much sticking?
Kate,
This looks amazing!!
I’ve been trying to marble with the same marabu inks using the method you’ve described, but fear I’ve done something wrong as my pages are far from the lovely ones you’ve created.
When I put the ink on the water, the ink spreads out instantly to fill the entire area and when I go to swirl, it’s as if the inks have already dried and cling, like gel, to the wooden skewers despite me doing it as quickly as possible.
Also, when I print, there are big areas missing with this congealed gel around the edges.
The inks are new and this my first time using them, so it can’t be a date issue.
Any idea on what’s going on?
Thanks,
Georgia
Hi Laela,
The link to the paints is in the ‘how-to’ section just above ^_^
Hi there, does this work on paper plates?
Thank you
Will nail polish work as well??
I love the way you did yours that’s so beautiful and the colors you used are amazing.