I‘ve been playing around with accordion paper folding for about a year now and thought it was high time that I put something on the site! The technique is really addictive.
This project shows how to make a simple candle holder. All you need is some paper, a glass jar and a little bit of glue so it’s a really affordable project. If you fancy having a go then you will find a full how-to after the jump.
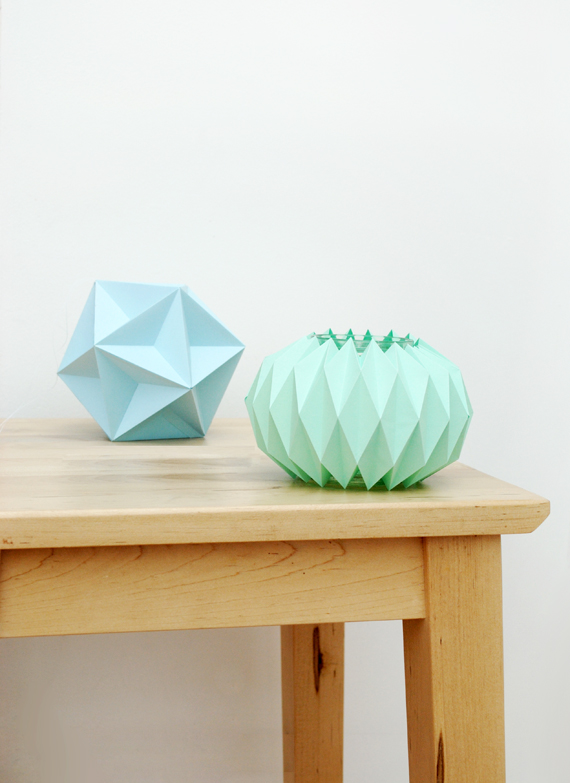
***IMPORTANT*** If you want to use this as a candle holder please make sure that you put a glass jar inside the paper cuff and ensure that there is no paper hanging over the top of the jar (otherwise it may set on fire). For safety reasons I would recommend using battery operated candles instead.
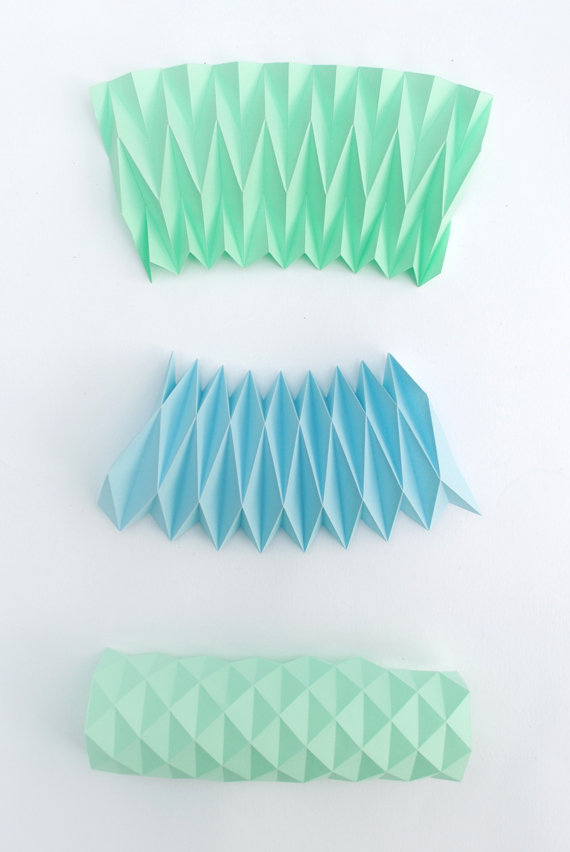
If you want to explore more of these folding techniques then you can buy a fantastic book called ‘Folding Techniques for Designers‘ by Paul Jackson. I had it as a present last Christmas and love it. (If you are strapped for cash then do try your local library ^_^)
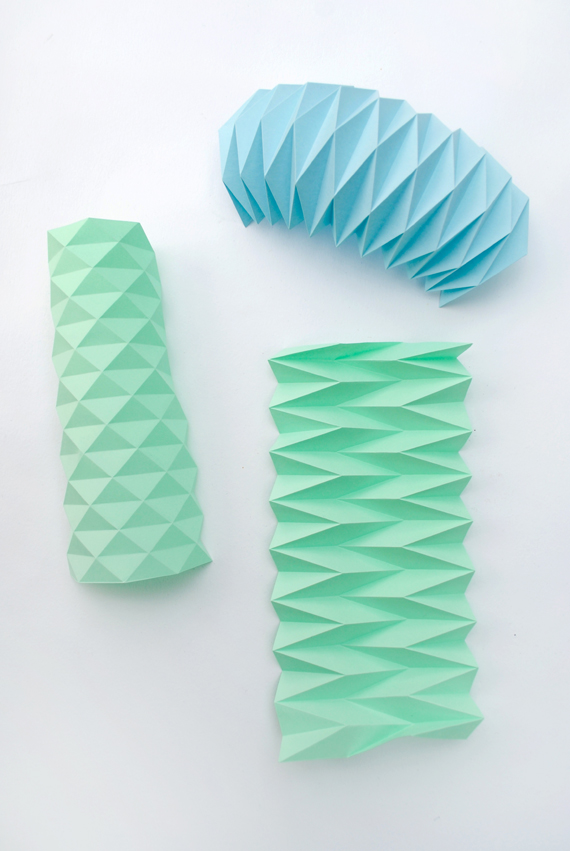
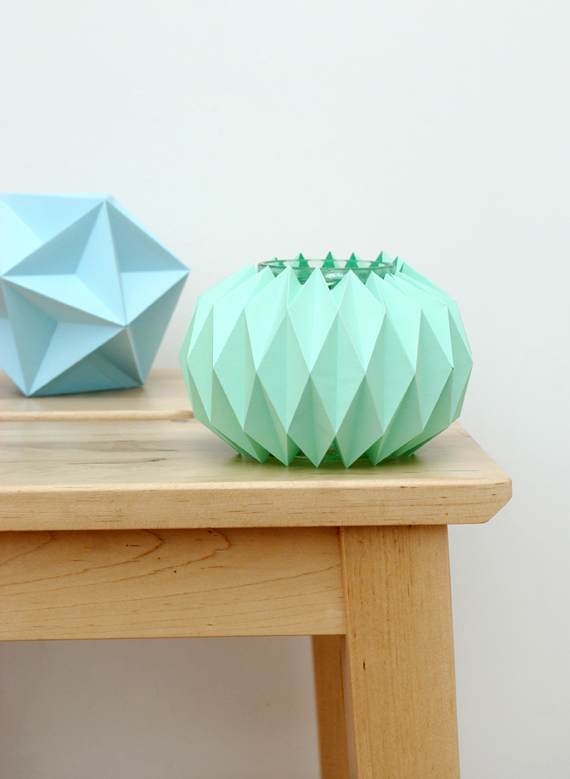

YOU WILL NEED:
– – – – – – – – – –
+ A4 Paper
+ Scissors
+ Ruler
+ Needle (for scoring)
+ Double sided tape/glue
+ Printable templates (all files are at the bottom of the post)
HOW TO
– – – – – – – – – –
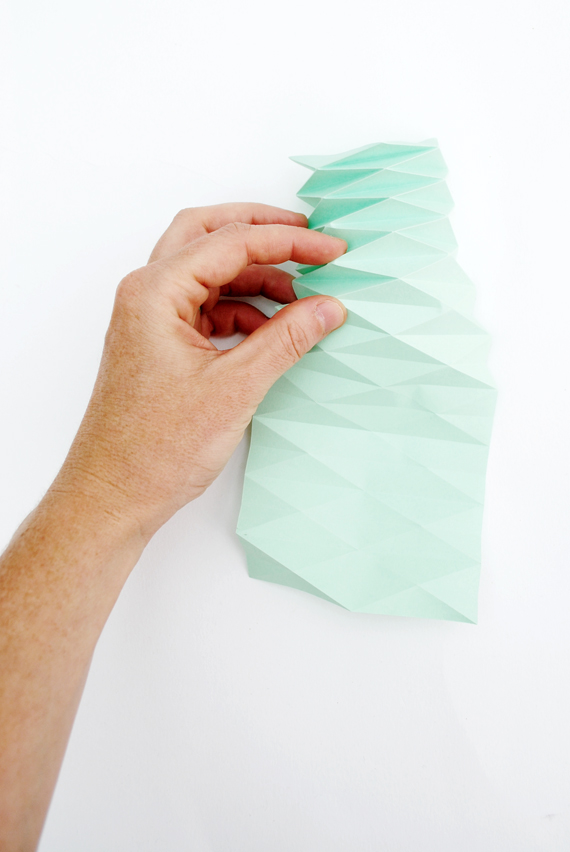
1. Print the template onto A4 paper. Cut along the dotted lines, you should have two pieces of paper. Score along all the solid lines using a ruler and sharp point.
2. Fold along all the horizontal lines (mountain fold).
3 & 4. Now fold along all the diagonal lines (valley fold).
5. Squeeze the outer triangles together on the top corners.
6. Continue doing the along the length of the piece of paper (this can be tricky at first so take your time).
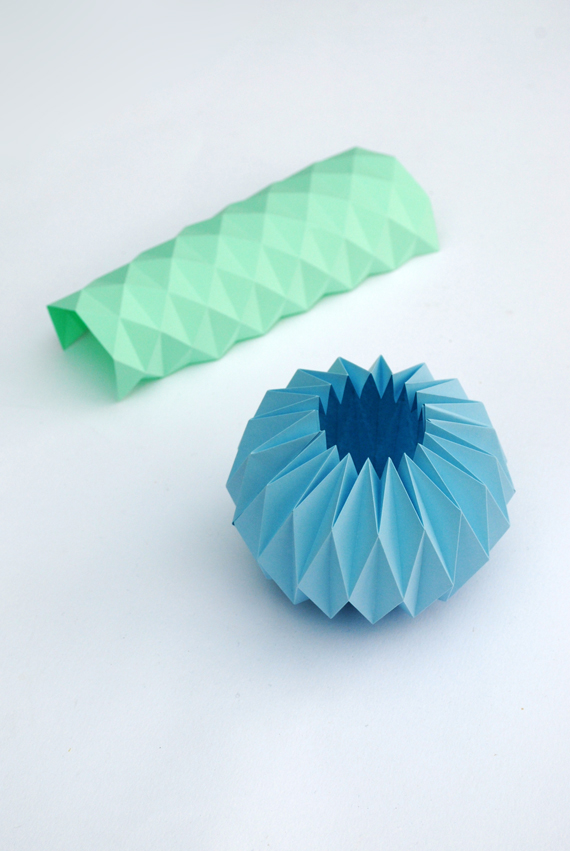
7 & 8. You should now be able to fold your paper up like an accordion. When it is fully collapsed press it together firmly (this will give you really sharp creases).
9 & 10. Using some glue, or double sided tape, stick the two pieces together to form a cuff.
***IMPORTANT*** If you want to use this as a candle holder please make sure that you put a glass jar inside the paper cuff and ensure that there is no paper hanging over the top of the jar (otherwise it may set on fire). For safety reasons I would recommend using battery operated candles instead.
PRINTABLE TEMPLATE:
– – – – – – – – – –
+ Template [pdf]

Beautiful, excellent idea !!
Merci beaucoup, c’est magnifique. Je viens de découvrir que ce livre existe aussi en français, je cours l’acheter demain!!
Merci aussi pour votre blog, votre partage. Tout est merveilleux. Un grand bravo.
Looks great! Will definitely try it out one day 🙂
This is amazing!!! I’m definitely giving it a try. Thank you! ♥
<3 DEFINITELY going to try this!
These look lovely! Is there a template for the light blue one with the stars?
Lots of love,
Lena
thanks 🙂
Yay…thanks Marlène. Glad you managed to find a french version of the book. Kate ^_^
Yay!
Not one on my site yet. Check out one here:
http://www.korthalsaltes.com/model.php?name_en=great%20dodecahedron
what is A4 paper?
Standard sized printer paper x
Where do you get all of your beautiful paper?
woow this is awesome, i have seen many times such light shades allready and thought this must be difficult to make.
but your great tute made it all looks simple and workable for me as well. I’ m greatful for all your efford you’ve done to share this great cool project with us all.
i will give it a try;-D Thank you so much!!!!!
Thanks Jet x
Hi Lindsey. The pastel paper come from WHSmiths – it’s just standard printer paper it come in a huge pack. The bright paper i use comes from Paperchase. Kate ^_^
Oh no Anna…poor you! Once you ‘get it’ and develop the knack it becomes easy I promise. Developing the knack does require a bit of patience. Collapsing the first few rows is the hardest bit.
I do remember screwing up my first few attempts and then I just sat in front of the tv one night with a sheet of paper and figured out how to do it. I couldn’t understand how the paper was able to collapse….anyway, I’m waffling. Do stick with it (and report back if you succeed)!
I might put a video up if there is enough call for it.
Kate ^_^
oh…..and you can cut one of the templates up into four pieces – so you have several smaller test pieces to work on. Once you have figured it out on a small scale try the large one.
So glad you succeeded…..it’s definitely easier to get the hang of on a smaller version. Once you have mastered this you can make lots of different folding patterns. I’ll try and get some examples on the site soon. Happy Tuesday. Kate ^_^
These look very cute! Thanks for the tutorial! I’ll give it a try!
thank you! <3
Hi Kate, love this! I suppose you could also use this on a larger scale to do a light pendant. Thanks so much… your blog is amazing and inspirational!
I love the candle holder. I will definitely try it.
I would like to make the thing with the star as well. Do you have an insturction for this as well?
wow!
I love this! thanks for sharing!
from vienna with love,
K
These look amazing! I will definitely be giving them a try!
omg you are a master in this folding, i tried to do this but i cant and im not patient, maybe i’ll try it again, maybe… 😀
love ur blog
It looks very pretty! where you get these interesting ideas to making all these pretty things….???? 😀 Thanks for sharing! 🙂
very cool project, i would love to know how to make the one in the bagground.
🙂
Hey Kate. I was folding your candle holder and in step 2 you say to fold the horizontal lines mountain folds and in step 3 & 4 you say to fold the diagonal lines valley fold. I followed your instructions and I found it very hard to collapse it. I tried a new one and changed it around so I did valley folds on the horizontal lines and mountain folds on the diagonal ones, and it pretty much collapsed on its own. So I think you might have written those two the wrong way around? Just wanted to let you know. I think it will help a few people that want to try out this kind of folding.
Thank you very much for a wonderful blog.
X Fanny
Hi Fanny,
Thanks for the comment. I thought about it and wondered whether it mattered which way it was done. If you turned your sheet of paper over would it not be the same as mine? Maybe you just found it easier to collapse that way around. Would be interested to hear your thoughts 🙂
Kate ^_^
Hey Kate, thanks for replying.
I realised that it depends on what way you have the paper, the first one I did I had the printed side down before i folded. I’m not sure which way you had it? but if you do have the printed side up and then do a mountain fold on the horizontal lines, what you wrote is right :). I couldn’t see in picture two if you had the printed side up, maybe just be more clear about that, because when I did it the other way around it was a lot trickier. If I would have just turned the paper then I would have had the printed side outwards which i don’t think looks very nice 😉 Thanks agin for getting back to me you are always very good with that.
X Fanny
Où avez-vous trouvé le livre en français?
C’est magnifique, j’ai trouvé la même chose chez “cachemire et soie”. Je vais me lancer et en faire la pub.
I LOVE these! ! BUT there was no templates to download at the end of the post.Could you let me know where to get them ? Thank you so much! 🙂
Thanks for the tip Bruce ^_^
This may sound stupid, but what does scoring(score, 1st step) exactly mean?
Hi Victoria,
There is a good explanation here:
http://articles.mybinding.com/how-to-score-paper/
Kate ^_^
I cannot collapse the paper. I done everyting all right (I think) and it doesn’t collapse. I just used up 10 pieces of paper just trying to fold it out. And everything ends with the paper being torn apart by the folding.
Im in Nigerian I like the craft, I want to get the book and get started how do I go about it.
Beautiful job and talent in display, keep it up.
Hi Kate, I found your tutorial last night and printed the template. Being a dutiful man I followed your instructions to the letter. Having cut out on the dashed lines, I then realised it would have been easier and slightly quicker to have scored the lines before cutting.
First set of folds went like a dream, the second sheet fought back, but we got there in the end.
Not quite sure how to join the two halves though. I have joined them by glue but it seem s to mess up the structure. ie. I have glued the end pieces. Should I have glued small pieces of paper to the two ends on the inside?
Peter
Thanks for the template! Here’s mine: http://stampingmathilda.blogspot.be/2014/11/accordion-folded-candle-holder.html
Salut,
j’adore cette idee, mais je voudrais savoir le prenom de ce origami, parce que je voudrais trouvè un video explicatif, en fin comment il s’appelle??? Merci
Corinne
Hello,
Wonderfull work!
Do you have the tutorial or informations about the blue star volume in back of the image?
I found the same in antics (wood)…
Thanks!!!
hi, i tried the accordian fold and it looks great. i wonder if u shared how to make the star shape tutorial before? if not can you share =) thanks