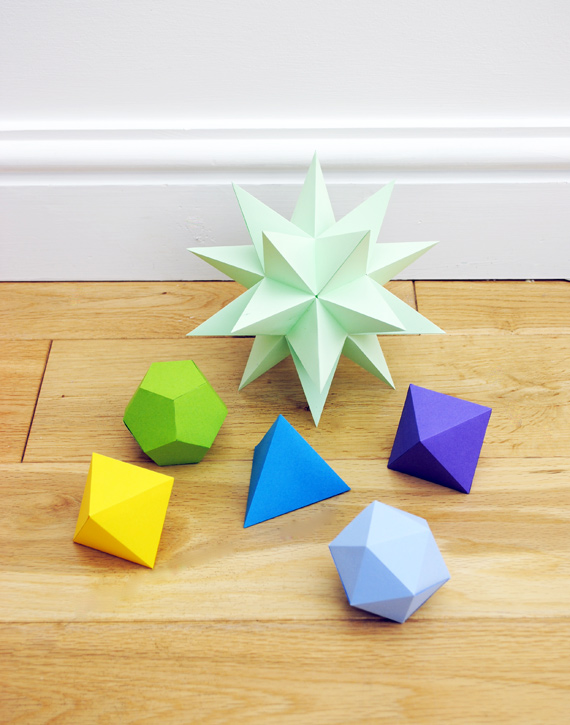
Hello there. I seem to be stuck in a geometric-paper-model rut at the moment! I promise this will be the last one for a while! (I have just white-washed a lot of the walls in our home so I have been looking to make some colourful objects to hang up…these are just the job).
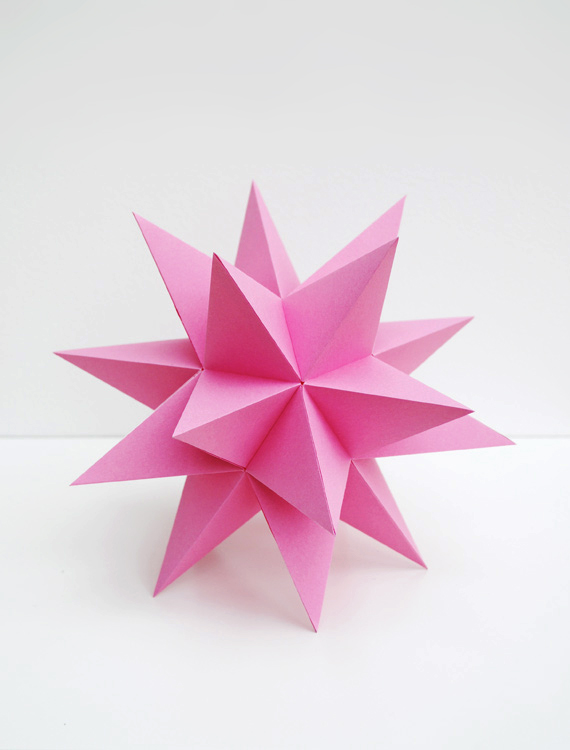
Making stellated dodecahedrons is fairly time consuming and requires a light-touch and a fair bit of patience…so teenagers/adults only! (I would say that each one takes about 2 hours to make…but you can do most of it with your feet up in front of the telly). They look fantastic and you will be super-chuffed when you have made one so don’t be put off. Greater effort = great satisfaction (hope you agree?!).
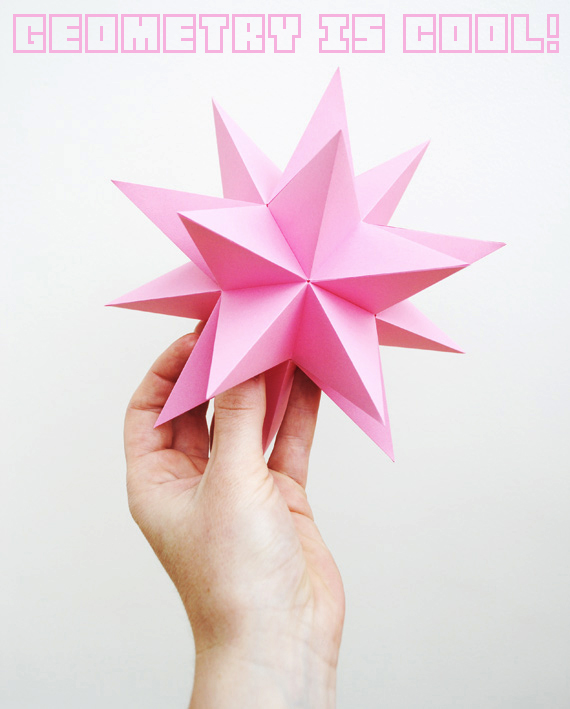
As usual there is a how-to below…along with printable templates.
It’s ‘summer’ here in the UK but it hasn’t stopped raining for months (or so it seems). Hope you are having less dissapointing weather wherever you are!
HOW-TO
You will need
– – – – – – – –
// Scissors
// Paper (or thin card)
// Double sided tape (I also made one using a gluestick but the tape yielded much better results)
// Ruler
// Needle…or similar sharp point for scoring the paper
– – – – – – – – – – – – – – – – – – – – – – – – – – – – – – – –
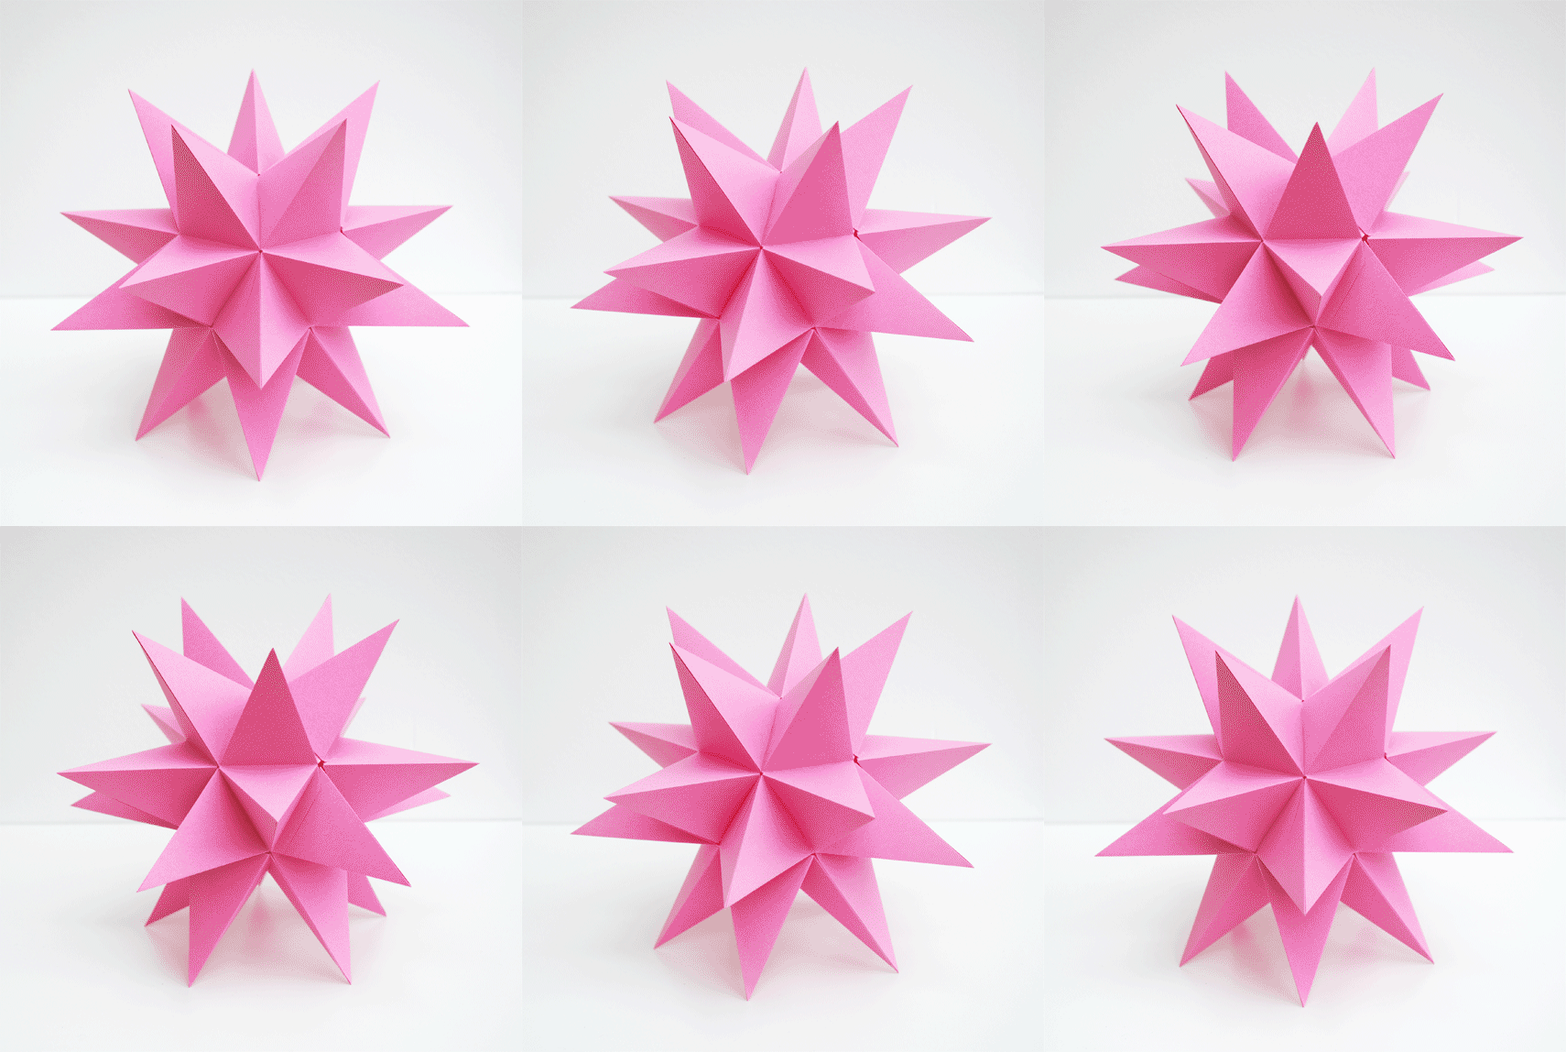
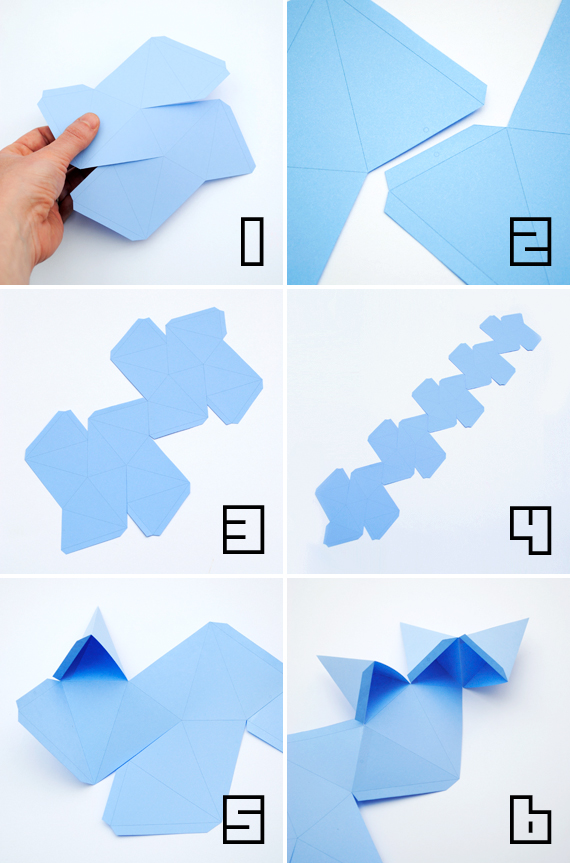
1. Download the template here (there is also a template with darker lines here as some people have had problems printing the lighter template). You will need 5 ‘shapes’ and there are two ‘shapes’ on the template…so you will need to print the template 3 times! Cut out each of the shapes as shown. Using a ruler and needle score along all the lines (the scoring is probably the most time consuming part of this project and accuracy is essential).
2. You then need to join the five ‘shapes’ together. Locate one of the little circle on one of the shapes and glue to the next shape.
3&4. Keep going until all five are stuck together.
5&6. Then you need to start creating the triangular points. To do this fold along the lines you previously scored and fold and glue….it looks complicated and perhaps a little confusing but I promise it will fall into place once you make a start.
*If you run into problems then do leave a comment below and I will get back to you ASAP*

Wow your shapes are definitely getting more complex! Amazing : )
Hi Kate,
I just discovered your fabulous blog and I’m trying to follow and/or subscribe but I’m afraid I’m not familiar with wordpress….I’ve looked over the whole blog twice and can’t find a button to do what I want….
Any help would be appreciated.
Hello OnePerfectDay! Try this link:
http://www.minieco.co.uk/subscribe/
^_^
Thanks LittleWren…yep, I am becoming obsessed! Must try to divert my attentions to something else! ^_^
These are very fun! I love pops of color! 🙂
what an amazing scheme!
i am going to try it i think!
& great tutorial as always!
Hi Bob…have you made the model?
It really does fit together perfectly…….and it is rounded, not egg-shaped.
Please have a go at making it and then get back to me ^_^
…as you can see in figure 5 when each triangle is folded, the base forms an equilateral triangle…
check out the link:
http://en.wikipedia.org/wiki/Great_stellated_dodecahedron
Me encanta todo lo que haces 🙂
Un beso!
Galletita.
When I printed off the template the actually shapes wouldn’t show up on either white or coloured paper so I was wondering if I could the template darker or is there a solution??
Thank you!!
Hi Haley,
I’ve add a darker template to the post for you to try out 😉
The direct link is here:
http://www.minieco.co.uk/images/jul12/stellated-dodecahedron-black.pdf
Thank you sooo much!! 😀
I love this! Thanks for posting; I’m going to try with some metallic paper. Should be cool!
these are delightful!
I love this little star thing but I’m still really confused on how it all goes together… I’m a very visual person, it would be amazing if you could show me steps pass six? Just do I know what I’m doing when I’m doing it. Thank you!
Thank you so much for this great tutorial. I love it! I just made a blogpost about my star. http://fargevandring.blogspot.no/2012/08/stella.html. And also thank you very much for an inspiring and creative blog:-)
Anne Lise
Hi Anne Lise, thanks for sending the link to your model….it losk great….yay! Have a happy Monday ^_^
So excited to give this a try. THANK you for sharing.
Thanks Jen,
I loved making these. one of my favourite projects ^_^
it’s awsome. really cool . thanks
This is amazing, I love it!
Hi Siobhan, they are here:
http://www.minieco.co.uk/i-mathematics-platonic-solids-garland/
Hello. I keep getting a WARNING when I click to download the pattern. Saying it may be a virus. Please send it to my email. I remember making these in 5th grade Math. Great memories 🙂
Hi Jo Lyn. Please right click and save to your desktop. The file contains no virus so please disregard the warning. If you are still having problems then leave another comment ^_^
Hi Andrea,
Just a quick message to let you know that I’m always available to give help and advice in the comments section if you run into problems.
I made mine with paper and it was fine….although thin card does make a stronger model. I would also recommend double sided tape rather than glue.
Best of luck if you decide to try it again.
So happy to hear it went well Caroline. Glad you had success using normal copy paper. Have a great xmas ^_^
If only you could have seen how excited my son’s teacher was when she saw the one we made from recycling for the school xmas tree (http://a-little-crafty.blogspot.com.au/2012/12/more-recyled-christmas-tree-ornaments.html) Fantastic design, Thankyou!
Looks fab Sally. Well done you (& pat on the back to your son too)!
heya kate, im a bit muddled with the folding hahah silly me …
Hello :] I’m actually doing the star, i have already created all the triangular points, and glued them, but then, I’m left with the small connecting paper, which i don’t know how to connect :[ and cannot complete my star :[ Look in step 6, on the triangles there is a piece of scored paper left, what should i do with it? How do I glue it? Can you help me out, please? :]
Hi Hannah…I think I am going to have to get a ‘new-and-improved’ tutorial up for this project but probably won’t have time until next week. So sorry to leave you in the lurch. I’ll email you once it’s done.
You start by sticking the five pieces together….then you fold the long lines backwards and the short lines forward.
Each group of three triangles comes together to form a 3d triangle (or point) then there is a spare tab which connects each point to the next.
….does that make any more sense?
As I said…I’ll try to get a better tutorial up…let me know if you succeed in the meantime.
Good luck
Kate ^_^
Hi Cookie…I think I am going to have to get a ‘new-and-improved’ tutorial up for this project but probably won’t have time until next week. So sorry to leave you in the lurch. I’ll email you once it’s done.
You start by sticking the five pieces together….then you fold the long lines backwards and the short lines forward.
Each group of three triangles comes together to form a 3d triangle (or point) then there is a spare tab which connects each point to the next.
….does that make any more sense?
As I said…I’ll try to get a better tutorial up…let me know if you succeed in the meantime.
P.S. If you want to send me a photo, let me know and I will email you directly then I can see exactly where you are having problems.
I made it, thank you soooo much for your quick response, it did help me a lot. I’m really happy with the result, thank you sooooo sooooo much for your tutorial and your help. ♥
Yay! Glad it went well Cookie. Have a fantastic Christmas 🙂
I can’t understand the 1st step please clear it from where it cut or not
But how I can’t made it even in the first step problem please help…
Hi Yash…you cut all around the outside and then along the dotted lines. Hope that helps ^_^
Bee….just flip the paper over so that the printed lines are on the inside…that’s what I did…works perfectly ^_^
I will, I promise 🙂
I found this very hard to figure out (in fact I couldn’t figure it out at all) I didn’t want to give up because I love, love the shape. I did some research and found a tutorial for making the body and the points separate and taping it together.
Here is a link to one made from Christmas cards;
http://www.jennyharada.com/fun-diy-christmas_card_star.html#
I want to make these as a permanent decoration for my home so my plan is to make it from poster board or thin cardboard (I save cereal boxes for this kind of thing). Once I have the shape put together nicely I am going to paper mache over it to make it more solid and sturdy and then decorate it. (I am going to paint the whole thing, then cover each point with a different design of scrapbook paper, then I am going to spray with a topcoat to seal it off) If they turn out to be easy enough I will decrease the size and make some for Christmas ornaments next year. I am thinking lots of glitter!
Thanks for sharing your ideas & discoveries Stacy (& sorry for the late reply ^_^)
Dear Kate,
Pls send me the large templates so i take the print i want a large star so i want a large print on only one print on A4 sheet please hurry, actually i have a 4 month old a baby she is very attract to this so i want to make the large star… waiting your reply.
Can you make a video to show how to fold it? I cant fold mine:(
What is scoring
Those shapes look GREAT!!!!!!
I tried to make one but it just looked like a crumpled up ball… You must have some serious talent!!!
I know right?!?!
Hi Samantha,
I will be doing a new tutorial for this (lots of people are having problems with it) but can’t fit it in for about another 6 weeks :0
Do pop back then and hopefully you will be able to make a lovely star rather than a crumpled ball of paper 🙂
Kate ^_^
Can you send me a picture?
Okay, thank you very much!!!!
AH! This is so cute, I’d marry it if it were legal.
ah I see…you have stuck the tabs on the outside, yes that would have been easier! thanks again for sharing your loveliness.
Hi Kirsten, well spotted…you can stick a needle through one of the corners and push it in that way…I think it would have been easier to do that it i used a stronger glue. I’ve just recently started using Bostick glu & fix which is really great and very strong.
that’s great i make the 5 star and bind with the ball looks nice at the door thnks very much Kate
Hi Kate,
Looks like a very nicely made model. I make these a little differently, see here:
http://www.software3d.com/GreatStelDod.php
I use double-tabs throughout, meaning each edge has a tab and I glue the tabs to each other, and keep all tabs on the inside. I also add some parts inside for strength. I wrote a program called Stella to create and print out the nets (templates). I’m afraid it’s not free (years of work!) but there’s a free demo version. Stella also has a facebook page where I post a lot of my models:
http://www.facebook.com/Stella4D
Thanks!
Rob.
what to do with the smaller tabs by th way thns a lot this was great u helped me a lot
dom dom dom dom dom
groetjes jolanda
Merci pour cette idée (c’est assez long à faire mais c’est très joli )
more details on constructing it please?
I should add that the school entered the tree in a competition (with the star made from your template at the top) which won the school some new vegie gardens. So thankyou again for sharing!
Nice! well, not. maybe… Amazing! yes, that’s it! Just one (really little) mistake: The plural of polyhedron is polyhedra, and the same goes for any polyhedron name that finishes by -dron, it make a plural in -dra. If that makes any sense.
Yay…well done you guys ^_^
These are dazzling! I agree with “Jess” that you should make a how-to video! : )
Nice job!!!
From.Managua.Nicaragua
Thanks 🙂
Hi Kate, this model is amazing. I’ve attempted the model 2 times now, both look great but are not quite right… one somehow used 6 pieces and is symetrical but the points are no evenly distributed all of the way round. The other used only 4 and fits together yet is totally aysmmetrical. The first time I folded all of the triganles up seperatly and then attached together…the second time I attached all the pieces and strarted folding and attaching as I went along… with both methods I seem to be attaching the wrong triangles together… please help me!! 🙁
Hi, I’m from Germany and I like your page very much. Sorry, but my English is not so good…I’ve tried several times to make this great star, but on the last two “wings” I don’t know how to fix this.
Do you have a tip for me regarding my problem, or can you tell me how to do it the easiest. perhaps what wing I should at last. For your answer many thanks in advance.
Nina
Hola todo esta bien pero solo muestran los tres primeros conos formados y los demas se hace igual o de otra forma… porfavor muestra la explicacion completa
I did this while at the hospital with my baby boy in the pcicu. Everyone thought it was so neat and he likes to look at it when he’s awake. Thanks!
what dose score mean??????????
I am so not great at this sort of thing, but thought i would give it a go, I have no idea what to do after number 6, could you help me put it all together?! Please? Thank you!
You get a ruler and a blunt pin, nothing too sharp. Then line up the ruler on all the lines and use the pin to go over the lines, this will make it easier to fold.
Hi Karissa,
I’m so sorry – I don’t have any more photo’s. The only thing I will say is that if you have glued all the points together then it should be ok. All the remaining tabs should only really be able to be stuck in a certain place.
This is a really tough model – especially if you are new to paper craft. It took me about three attempts to get it right.
As soon as i can put a more complete tutorial up I will – but realistically that isn’t going to happen before Christmas.
So sorry
Kate ^_^
Hi, you can see a little film here explaining how to do it:
http://www.youtube.com/watch?v=9xvHV_qBq3g
I can’t figure this out! And I don’t want to give up!
Could you make a video that shows one how to fold and glue the paper after step 5/6?
Absolutely gorgeous. You really know how to put a beautiful ideas, thanks for sharing it with us 🙂 ..
This idea is amazing. i had to make one as soon as i saw it. thank you for posting such a unique idea. ours turned out beautifully ..
Is there any video tutorial posted for this… ?!
I’m sorry MC – not yet.
Kate ^_^
hey you say that we have to do needle scoring along the lines and i dont know what needle scoring is please explain to me what that is.
How thin should the paper be? And what size or how much should i buy?
do I cut on the doted lines???????????
This is so beautifull, I love making decorations, these are great!
Hi 🙂 I made these yesterday. It took me a while to get it but I did it. I have to ask you though. How did you glue the last one?
hey 🙂 you are supposed to cut the dotted lines 🙂
i made these too and took me a while to figure that out too 🙂
Hi Gary, It seems like you know what to do and that you have made this before. What is needle scoring and which lines would I needle score?
how to make that thing that is shown in the irst step
i cannot make it. i m trying
Hi Gary – I cheated and glues the last tabs on top *^_^*
Glad to hear someone had had success with this project – I keep meaning to get a full tutorial up but time is against me!
Hi Crystal – you cut around the outside first, then along the dotted lines. Finally you needle score the remaining solid lines. Hope that makes sense. Kate ^_^
Hi Sadia123,
You cut around the outside of the template first. Then you cut along the dotted lines. Finally you needle score the remaining solid lines. Hope that makes sense. Kate ^_^
Very interesting and cool!)
This figure turned out beautifully! It really isn’t until all the triangular points are glued that you figure out how to finish the piece. The points seem to tell you how they should go. I’ve included a few of these stellated dodecahedrons on my string of mini Christmas lights. Looks terrific.
By the way, for those of us across the pond, what does “super-chuffed” mean?
Best wishes.
Thanks Mike – so glad it turned out well. I think they are pretty intuitive to put together. Although they seem confusing I think its hard to go too wrong.
Chuffed = Happy
Super = Very
^_^
Hello!
What a wonderful tutorial! Thank you so much for posting it. I had a fun time putting this one together, and while it took a decent amount of time to complete, I am happy with the results. Here is a link to my blog post with my star/flower. I made sure to credit your blog with the tutorial link 🙂
http://thepaperbouquet.com/portfolio-item/14/
Best wishes.
Looks great Sharon…so pleased to hear that people are managing this project ^_^
Way to go Abbie,
Let me know if you get around to making a super-size version. Kate ^_^
Hi! Great tutorial! Just one question. I have to make one of these for geometry, but I ran into a problem…
I fold along ALL the lines, right? Because right now there’s this lump of triangles at one end and it doesn’t look right…
Once I’m finished, how do I close the shape?
shut the fuck up lol
Again need a paper Master at school but oh well
Hey Kate,
I made the shape, but it doesn’t fit together. Do the dark circles match with other dark circles or light circles. It’s all wobbly and strange looking. I’m not very crafty and have to do this for a math project, so I’m a little over my head. Any advice for egg-shaped wobbly looking ones?
Thanks,
g
hello
I made the shape, but it doesn’t fit together. Do the dark circles match with other dark circles or light circles. It’s all wobbly and strange looking. I’m not very crafty and have to do this for a math project, so I’m a little over my head.
Thanks,
g
LOVE it I am working on it right this minute! Thank you for the template also.
I tried this out and I couldn’t get past step 6, and I ended up throwing it away. It would be really appreciated if you could do a more detailed tutorial.
I dont know why but when I print it out and try to follow your steps while putting it together, I had to flip it over or else it wouldn’t work. So my model came out with all the lines and dots showing 🙁
Dear Kate,
the first time I saw the dodecahedron I fell in love with it, cause I usually love all kinds of crafts and I’m good in them. so, I decided to make one. the print went ok.
then, when I started cutting out the shapes I got a little lost cause it appeared that the template is actually a mirror image. however, with lots of circling around and “detective” work I managed to do it correctly.
the joining of the 5 shapes also went difficult because of the mirror image. luckily, I managed to figure it out, too.
and then the forming and gluing stage came along… and I totally lost it. I have no idea what to do.
I see in the previous comments that you promise to do a more detailed tutorial. is it ready now? can you pls send me a link to it.
thanks!
im trying to print out the directions from my ipod touch but its rintingou everything i dont want it to print
typo rintingou =printing out
Yes….. Don’t be rude… I’d like to see you with such great ideas…
Did you ever make a newer tutorial? I think I understand this but thought maybe there was a newer one.
can you please make a video on this? i am very lost on mine, and i dont wanna have to give up on it since i worked so hard on it already.
Help needed .All cut out lines cut and scored and can see the black dot you have mentioned but haven’t a clue
from the diagram what sticks to what . Would love to be able to complete this .
Thanks Sue
Normally I’m against killing but this article slrgahteued my ignorance.
Holame gustaria tener los pasos para lá estrella me ha llamado la atención grasias
I made it in papier. Wonderfull !!!!
Now I am gonna make the star in glass ( Tiffany )
i don’t understand how you cut it out and make it look like the first step
how do you cut it out and make it look like step 1
never mind i figured it out
Hola! Estuve intentando hacerlo para un trabajo de la escuela pero se me hizo muy complicado entender los pasos, hice los triángulos 3d pero después de ese paso no sé cómo unirlos para darle forma a la estrella, he tratado de varias maneras y no se me da, quisiera saber si puedes realizar un vídeo tutorial mostrando el paso a paso, así sería más comprensible el procedimiento